When tiling a bathroom or kitchen, you might wonder whether the cement board needs to be sealed first. To avoid moisture from seeping into the cement board and damaging the tile and the substrate below, you should always seal it before tiling.
Cement board is a popular choice for tiling because of its durability and resistance to moisture, but it is not impervious to water damage. Sealing the cement board is an essential step in preparing the surface for tiling.
Start by preparing the surface and applying a waterproof or water-resistant membrane. For added protection, use a liquid waterproofing sealant and apply it to all seams, corners, and screw holes. Don’t forget to caulk non-sealed areas and allow proper drying time before tiling.
Here we’ll discuss how to seal cement board before tiling and other things to keep in mind if you’re going to tile over cement board.
How Do You Seal Cement Board Before Tiling?
Sealing cement board before tiling helps prevent moisture-related issues and ensures long-lasting and durable tile installation. Here’s a step-by-step guide based on the provided content:
- Step 01: Prepare the surface
- Step 02: Apply a waterproof/resistant membrane
- Step 03: Caulk non-sealed areas
- Step 04: Choose a liquid waterproofing sealant
- Step 05: Seal all seams, corners, and screw holes
- Step 06: Incorporate fiberglass mesh for added protection
- Step 07: Allow proper drying time
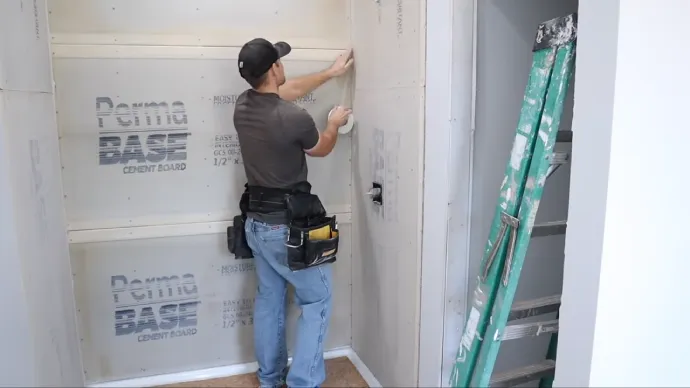
Step 01: Prepare the Surface
The first step in sealing the cement board before tiling is to prepare the surface. This means ensuring that the cement board is properly installed and securely fastened to a solid foundation, such as wood studs. Any gaps or seams should be filled with thin-set mortar or joint compound designed for cement board.
With the right preparation and tools, you can easily seal your cement board and ensure a smooth, successful tiling project.
Step 02: Apply a Waterproof/Resistant Membrane
To ensure long-lasting protection against water damage, you should apply a waterproof or water-resistant membrane against the wood studs before tiling. Did you know that over 90% of tile failures are due to moisture-related issues?
By installing a membrane over the studs, you create an additional barrier that prevents the cement board from being penetrated by water and reaching the underlying structure. This is particularly important in areas that are prone to moisture, such as bathrooms, kitchens, and laundry rooms.
To apply membranes, you should start by cutting them into the appropriate size for your installation. Make sure that the membranes overlap the edges of the cement board and have enough space for grouting. Then, use a caulk gun to secure them in place with adhesive or screws.
Step 03: Caulk Non-sealed Areas
Don’t forget to use a high-quality caulk that’s compatible with cement boards around fixtures or transitions to ensure a continuous barrier for your tile installation.
This is especially important in areas where sealing with liquid waterproofing sealant isn’t possible. The caulk should be applied first, and then the liquid waterproofing layer should be applied on top of it to ensure a continuous barrier.
This will prevent any water from penetrating the cement board and reaching the substrate, which can cause damage and lead to mold growth.
You should choose a caulk that is specifically designed for use with cement boards and is compatible with the liquid waterproofing sealant you plan to use. The caulk should also be rated for use in wet areas to ensure it can withstand the moisture that comes with a tile installation.
Take your time when applying the caulk to ensure it’s evenly distributed and covers all the gaps and seams around fixtures and transitions.
Step 04: Choose a Liquid Waterproofing Sealant
After the caulk has been applied, you can move on to the liquid waterproofing sealant. This will help keep water from seeping into the seams and cracks of your tiles. When selecting a sealant for cement board, make sure it is rated for use with ceramic or porcelain tile installations.
Redgard and similar products provide a watertight seal that protects against deterioration and other issues related to water damage. When choosing a liquid waterproofing sealant, it’s also important to follow the manufacturer’s instructions carefully.
Different products may require different application methods or drying times, so be sure to read the label thoroughly before starting the job. The sealant may also require multiple coats for added protection on cement board, especially if the project is in a high moist area.
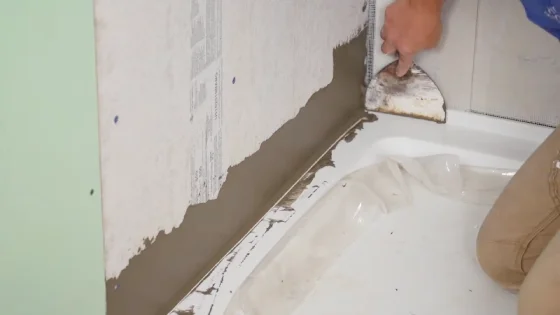
Step 05: Seal all Seams, Corners, and Screw Holes
Now it’s time to seal the cement board. When working with cement boards, you don’t want water to seep through all the seams, corners, and screw holes.
To start, use a brush or roller to apply the sealant to any seams, corners, or screw holes on the cement board. Be sure to cover the entire area thoroughly and create a second coat once the first one is dry, following the manufacturer’s instructions.
This will provide extra protection against water damage and make sure that your tiling job is long-lasting.
Step 06: Incorporate Fiberglass Mesh for Added Protection
After you’ve sealed the seams, corners, and screw holes, it’s time to add an extra layer of protection with fiberglass mesh. The fiberglass mesh provides an additional layer of protection to the cement board, which is vulnerable to cracking due to its rigid nature.
To incorporate the fiberglass mesh, simply mix it into the first coat of your liquid waterproofing sealant. Apply the mixture to the cement board using a trowel, making sure to cover all seams, corners, and screw holes.
Once the first coat has dried, apply a second coat of the sealant without the fiberglass mesh. This will create a smooth surface for your tile installation.
Step 07: Allow Proper Drying Time
Now that you’ve applied all the necessary layers for waterproofing, it’s time to let the sealant fully dry and cure. Depending on the climate and temperature, this can take anywhere from 24 to 48 hours. Make sure to wait until all surfaces are completely dry before attempting to tile over them.
During this waiting period, it’s important to avoid any moisture or water exposure that can affect the sealant’s effectiveness.
Keep the area dry and well-ventilated to promote proper drying and curing. After the sealant has dried and cured, you can proceed with your tile installation knowing that your cement boards are protected and ready to handle any moisture.
Can you tile directly onto a cement board?

You can confidently lay your tiles right onto the cement board, as it’s a reliable substrate that’s perfect for tiling. But, it’s generally recommended to seal the cement board before tiling.
Sealing the cement board can prevent any water or moisture from seeping into the substrate, which could potentially lead to damage over time. It also improves the adhesion of the tile mortar or adhesive, ensuring that your tiles stay in place for years to come.
To sum it up, tiling directly onto cement board is definitely possible and a great option for your tiling project. Just make sure to seal the cement board first for added protection and better adhesion.
Can you tile on the smooth side of a cement board?
Tiling onto cement board’s smooth side is a viable option for those using latex mastic as their adhesive. The smooth side provides a flat surface, which is especially useful for installing smaller tiles.
When using latex mastic, note that cement board smooth sides should face outward. This is because latex mastic requires a smooth surface for proper adhesion. The rough side is better suited for thin-set mortar adhesive, often used for larger tiles and high moisture areas.
But properly sealing the surface is recommended before tiling on smooth cement board. Thoroughly seal the cement board with a waterproof coating for added protection and better adhesion.
Is it better to tile over plywood or cement board?
When it comes to tiling, it’s essential to weigh the pros and cons of using plywood versus cement board.
Plywood is not compatible with most latex-based thin-set mortars and can absorb moisture, which causes the tiles to loosen and separate from the surface over time.
For a better tiling experience, go for cement backerboard. It’s engineered specifically for tiling and offers a smoother application and stronger adhesion, thus reducing the likelihood of your tile job failing.
Cement backerboard is also moisture-resistant, which makes it ideal for tiling areas frequently exposed to water, such as bathrooms and kitchens. Despite this, it’s crucial to seal the cement board before tiling if used in high-moisture areas like bathrooms and kitchens.
Protect Your Tile Installation: Sealing Cement Board Before Tiling
Sealing cement board before tiling is a crucial step in ensuring the longevity and durability of your tile installation. You can avoid potential water damage to your tiles and underlying structure by preventing moisture from penetrating the substrate.
Also, proper sealing improves adhesive performance, providing a secure and long-lasting installation. It’s also important to note that cement board is preferable for tiling over plywood due to its moisture-resistant nature and tile adhesive compatibility.
Tiling directly on cement board or using the smooth side reinforces the need for sealing to enhance adhesion and reduce the risk of water damage. Without proper sealing, you risk compromising the integrity of the installation, leading to costly repairs or replacements.
Hence, sealing your cement board before tiling in your bathroom, kitchen, or anywhere exposed to water ensures your project’s success, added strength, and longer durability.