You spend a lot of time and energy painting your home, but it’s not finished until you caulk the seams and cracks. Sooner or later, every home needs caulking, but it’s often neglected because it’s not as much fun as painting.
Cracks and seams that are not caulked can lead to water damage, mold growth, and even insect infestation. Still, one big question arises when you ask, how to caulk after painting?
Throughout this post, we’ll walk you through some caulking tips so you can achieve the desired results after painting and ensure the safety of your home.
What Do We Need?
- High-quality Caulking Gun
- Cotton/Damp rag
- Scraper
- Masking Or Painters Tape
- Suitable Quality Caulk
Steps on How to Caulk After Painting
Our goal is to provide you with a step-by-step guide and some amazing home improvement advice on caulking after paint so that you can get the job done right and avoid any costly mistakes.
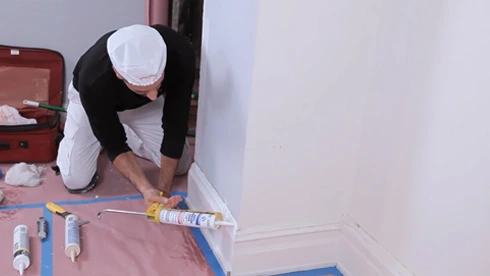
1. Prepare The Workpiece
Before caulking, make sure the surface is clean and dry. Remove any old caulking or debris with a scraper. If the surface is wet, it will not hold the caulk properly and you’ll end up with a mess.
If the surface is painted, wait for it to fully dry before caulking. In most cases, it’s best to wait at least one day. If you’re caulking a joint between two surfaces, make sure they are flush with each other.
2. Use Masking Tape Properly
When taping off the area you’re caulking, make sure to use masking or painter’s tape. This type of tape is designed to peel off without leaving residue.
Other tapes may damage the paint or caulking. So be careful when selecting your tape. You can’t use just any old tape.
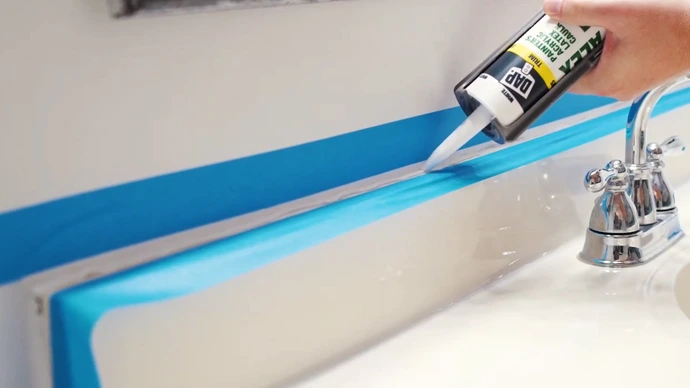
3. Get The Caulk Gun Ready
Cut the caulk tube tip at a 45-degree angle. This will give you better control of the caulk. Next, puncture the seal inside the tube with a nail or something sharp.
Now, load the caulking gun by holding it upside down and inserting the tube into the barrel. Cut off the tip of the tube so that only a small hole is left. You can always cut more if needed, but it’s hard to add more later on.
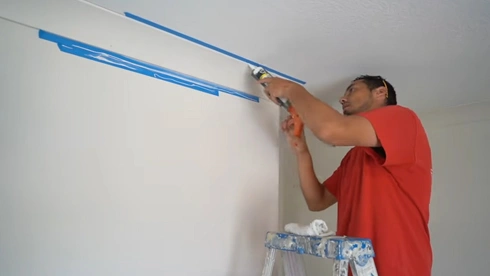
4. Apply The Caulk
Now it’s time to start caulking. Gently squeeze the trigger while moving the gun along the seam. Be sure to apply even pressure as you go. The goal is to fill the seam without leaving any voids.
If you’re new to caulking, practice on a piece of cardboard or scrap wood first. This will help you get a feel for the right amount of caulk to use.
5. Smooth It Out
Once you’re finished caulking, remove any excess caulk with a damp rag. Be sure to clean up any drips before they dry. If the caulk does dry, you can use a razor blade to scrape it off.
6. Wait for The Caulk To Dry
Caulking is a drying process, so you’ll need to wait for it to cure before painting over it. The curing time will vary depending on the type of caulk you use. Read the instructions on the tube for more information. Usually, it takes about 24 hours for the caulk to fully cure.
7. Take Off The Masking Tape
Once the caulk is dry, you can remove the masking tape. Be careful not to pull up any paint as you peel it off. Also, make sure the caulking is completely dry before removing the tape.
A Few Things to Remember When Caulking
There are a few things to keep in mind when caulking:
Avoid Caulking In Direct Sunlight
Don’t caulk in direct sunlight. The caulk will dry too quickly, and you’ll end up with a mess. Wait for a cloudy day or work in the early morning or evening.
Never Caulk Wet Paint
Don’t caulk over paint that’s still wet. The caulk may not stick properly. Wait for the paint to dry completely before caulking.
Observe The Weather
Don’t caulk if it’s raining or snowing. The moisture will prevent the caulk from curing properly. Wait for a dry day before caulking.
Don’t Rush
Allow enough time for the caulk to dry before painting over it. The drying time will vary depending on the type of caulk you use. Read the instructions on the tube for more information.
Avoid Excessive Pressure
Don’t apply too much pressure when caulking. This can cause the caulk to splatter and create a messy finish. Apply even pressure as you go.
Start Over If Needed
If you’re not happy with the results, you can always remove the caulk and start over. Just make sure the surface is clean and dry before caulking again.
Caulking is an important part of painting your home. By following these tips, you can ensure a professional-looking finish that will last for years to come.
FAQs
We will cover some frequently asked questions about caulking so you can be better prepared for your project.
Is It OK to Caulk After Painting?
Yes, you can caulk after painting; however, you must wait for the paint to dry completely before caulking. This will ensure that the caulk adheres properly and does not peel or flake off.
What Type of Caulk Should I Use?
For painted surfaces, Latex Caulk or Acrylic Latex Caulk is a good option because it is easy to apply and flexible, so it will not crack or shrink as the surface expands and contracts.
How Long Does Paint Need to Dry Before Caulking?
Paint needs to dry for at least 3 to 12 hours before caulking. For best results, allow the paint to cure for 24 hours before caulking.
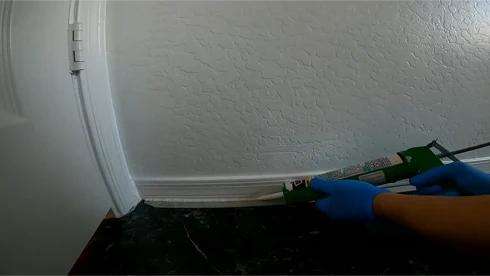
Can I Caulk Baseboards After Painting?
Yes, you can caulk baseboards after painting. In fact, caulking is often necessary to create a finished look and prevent paint from cracking or chipping. You’ll want caulk that matches the baseboards rather than the wall.
Can I Caulk Over Old Caulk?
Yes, you can caulk over old caulk; however, you’ll need to remove any old caulk that is cracked, peeling, or flaking off. You’ll also need to clean the surface thoroughly before caulking.
To remove the old caulk, use a utility knife or putty knife to score the caulk. Then, use a caulking remover tool or a plastic putty knife to pry the old caulk away.
Final Verdict
We hope this article was helpful and gave you some useful information about caulking after painting. By following these tips, you can be sure that your caulking job will be a success.
If you have any questions, please don’t hesitate to ask us in the comments. We will be happy to help you out.
Happy caulking!