Moving homes is often exciting, allowing us to explore new surroundings, meet new people, and create new memories. And it’s also a substantial responsibility, requiring a lot of planning and hard work. One critical step is cleaning your house before the big move.
You can declutter your home by sorting items into three categories: Keep, Donate, and Toss. Ensure every room is deep cleaned, starting with the bedroom and living room. After that, check out the kitchen, the bathroom, the garage, the basement, and the attic.
A clean home makes packing more manageable and ensures you’re not bringing dust or grime into your new space. This guide will provide practical tips and strategies to efficiently and effectively clean your house before you embark on your moving adventure.
How to Clean House Before a Big Move: Decluttering (Keep, Donate, or Toss)

Whether you plan to clean the entire house or hire a professional cleaning service, having an organizational framework and timeline helps significantly. Here are the primary steps when it comes to pre-moving cleaning:
1. Sort Through Belongings Room by Room
As you sort, create three piles for each room: “Keep”, “Donate”, and “Toss”. Be honest with yourself about what you truly need and use. Items you haven’t used in a year or more are prime candidates for the ‘Donate’ or ‘Toss’ pile.
Remember to sort through closets, attics, basements, and garages. These often overlooked areas can be treasure troves of forgotten items.
Take special care with items of sentimental value. If it’s something you love and will use, keep it. Consider letting it go if you’re holding onto something out of guilt or obligation.
2. Create Three Piles: Keep, Donate, and Toss
The ‘Keep’ pile should consist of items you use regularly, have sentimental value, or are essential for your daily life. You can’t imagine living without these things or will need them immediately when you get to your new home.
The ‘Donate’ pile should include items in good condition that you no longer need or use. These are items that could be of use to someone else. Consider donating to local charities, schools, or community groups.
The ‘Toss’ pile is for broken, damaged beyond repair, or otherwise unusable items. Be responsible when disposing of these items. Recycle what you can, and properly dispose of anything that could be harmful to the environment.
3. Be Ruthless: If You Haven’t Used It in a Year, Consider Letting It Go
In the quest for decluttering, it’s crucial to be relentless with your decisions. If there’s an item you haven’t used or worn in over a year, it’s a clear indicator that you can live without it. This rule is particularly relevant for clothes, kitchen utensils, books, and gadgets.
Remember, discarding unnecessary items creates a more organized space, reduces stress, and makes room for new things. Be stern and let go of the unused items, initiating a new phase of uncluttered living.
4. Recycle or Properly Dispose of Items in the “Toss” Pile
Proper disposal of items from your ‘Toss’ pile is not just a step towards decluttering but also a contribution to environmental sustainability. You should recycle paper, plastic, glass, and certain electronics, or take them to your local recycling center if these items can be recycled.
For items that can’t be recycled, like certain chemicals or broken electronics, it’s essential to dispose of them responsibly. Your local waste management facility or municipal website should have guidelines on properly handling these materials.
5. Donate Usable Items to Charity or Consider Hosting a Garage Sale
In your decluttering journey, you may come across items that, while no longer helpful, are still in good condition. Instead of tossing these items, consider donating them to a local charity. Many organizations constantly need clothing, kitchen items, books, and more.
Not only does this help those in need, but it’s also another way to dispose of your items responsibly. Alternatively, hosting a garage sale could be a great option if you have many such things. This way, you can ensure that your items find a new home while making some extra money.
Deep Cleaning: Room by Room
1. Bedrooms and Living Areas
Dust All Surfaces, Including Blinds and Ceiling Fans
Make sure to dust all surfaces meticulously. Start with higher areas like ceiling fans and work down to tables, chairs, and other furniture. Use a microfiber cloth or a suitable duster to capture the dust.
When dusting blinds, open them and dust each slat individually to remove all dust. Remember also to dust window sills, picture frames, and other decor. Once the dusting is completed, you can proceed to the next cleaning step.
Vacuum Carpets, and if Possible, Have Them Professionally Cleaned
Carpets tend to accumulate dust, dirt, and allergens over time. Hence, regular vacuuming is crucial to maintain a clean living environment. Run the vacuum cleaner back and forth over the carpet, spending extra time in high-traffic areas.
Consider cleaning your carpets professionally at least once a year if your budget allows. Your carpets will look refreshed and spotless after professional carpet cleaners remove deep-seated dirt and stubborn stains. Many landlords require tenants to complete a bond clean checklist before moving out.
Clean Windows and Window Sills
Cleaning the windows and window sills is an essential step that should not be overlooked. Start by removing dust or loose dirt from the window sills using a small brush or a vacuum with a brush attachment. Then, wipe the sills down with a damp cloth and a mild cleaning solution.
For the windows, spray a glass cleaner onto the surface and thoroughly wipe them clean using a microfiber cloth or squeegee.
Remember to clean the windows inside and outside for the best results. You may need to use an extension pole or hire a professional window cleaning service for hard-to-reach outside windows.
Wipe Down Baseboards, Door Frames, and Light Switches
These often neglected spots are notorious for collecting dust and dirt. Cleaning them is crucial to maintaining a pristine home. Start by dusting off the baseboards, door frames, and light switches with a dry microfiber cloth or a duster. Then, use a damp cloth and gentle cleaner to wipe them down.
Be sure to get into all the crevices and corners, as these spots accumulate the most grime. You may need to use a scrub brush or an old toothbrush for stubborn stains. Once done, wipe the surfaces dry to prevent moisture damage.
2. Kitchen
Empty and Clean the Refrigerator and Freezer, and Defrost if Necessary
To ensure your refrigerator and freezer are clean and operating efficiently, it’s essential to periodically empty and clean them. Start by removing all items, checking the expiry dates and disposing of spoiled or expired goods.
Next, unplug the appliance and, if necessary, begin the defrosting process. Always place towels around the base of the appliance to absorb any water from melting ice.
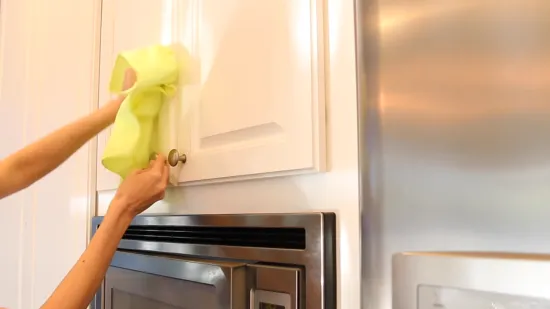
Wipe Down All Countertops and Cabinets (Inside and Out)
Wiping down all countertops and cabinets (inside and out) is crucial to maintaining a clean and hygienic kitchen. Begin the process by removing all items from your cabinets and countertops. Using a soft cloth dipped in a mild detergent solution, start wiping down each surface, ensuring each corner and crevice is covered.
Pay special attention to areas around the handles or knobs, as they often harbor more grime due to frequent contact. After cleaning, use a dry cloth to wipe them again to prevent moisture damage. Lastly, organize your kitchen items neatly before returning them to the cabinets.
Clean the Sink and Garbage Disposal
Cleaning the sink and garbage disposal is imperative to maintaining a sanitary kitchen. Begin by sprinkling baking soda into the sink and scrubbing gently with a soft brush. This helps to remove stains and odors. Don’t forget to clean the faucet and handles, too.
For the garbage disposal, run some cold water and slowly pour in a half cup of baking soda, followed by a cup of vinegar. Let the mixture fizz and work magic for a few minutes, then rinse it with boiling water.
This natural cleaning method effectively breaks down grease and food debris, eliminating foul odors and ensuring proper garbage disposal operation.
3. Bathrooms
Scrub the Toilet, Shower, and Sink
Scrubbing the toilet, shower, and sink is essential for maintaining a germ-free and refreshing bathroom. Start with the toilet, using a quality toilet bowl cleaner and a sturdy brush. Pay particular attention to the underside of the rim, where water deposits often accumulate.
A good scrub is necessary for the shower to remove soap scum and mildew. Scrub the walls, floor, and door, if applicable, using a bathroom cleaner suitable for your shower’s material (tile, fiberglass, etc.). A small brush can help you reach into corners and grout lines.
Lastly, don’t forget the sink. Use a non-abrasive cleaner to avoid scratching the surface. Pay special attention to the faucet and drain areas, often breeding ground for bacteria.
After scrubbing, rinse thoroughly with warm water. Regularly cleaning these areas will ensure your bathroom looks clean and is hygienic and safe for use.
Clean Mirrors and Any Glass Surfaces
For mirrors and other glass surfaces, employ a high-quality glass cleaner and a microfiber cloth to ensure a streak-free finish. Spray the cleaner onto the cloth rather than directly onto the glass to prevent runoff into areas you don’t want to clean.
Wipe in a circular motion, taking care to reach all corners. For troublesome spots, a bit of elbow grease can make a difference. Regularly cleaning these surfaces creates a polished, bright, inviting bathroom environment.
Wipe Down All Cabinets and Drawers
When it comes to cabinets and drawers, wipe them down with a damp cloth and mild cleaner. Pay special attention to handles or knobs where grime often builds up. For the inside of drawers, empty them and wipe them down, ensuring to remove any dust or dirt that may have accumulated over time.
Consider using a wood cleaner to restore shine and protect the surface if your cabinets are wooden. Regularly cleaning your cabinets and drawers not only maintains the aesthetic appeal of your bathroom but also extends the longevity of these fixtures.
Clean Out and Properly Dispose of Expired Medications and Products
To ensure a safe and clutter-free bathroom, it’s essential to regularly clean out and properly dispose of expired medications and products. Begin by emptying your medicine cabinet and drawers and examining each item’s expiry date. Dispose of all expired medications, skincare products, and cosmetics.
Remember, some things may need special disposal procedures, particularly prescription medications. Instead of throwing them in the trash or flushing them down the toilet, bring them to a local pharmacy or a community take-back program.
Regularly cleaning out expired products reduces the risk of accidental consumption or use and provides an opportunity to declutter and organize your bathroom space.
4. Garage, Basement, and Attics
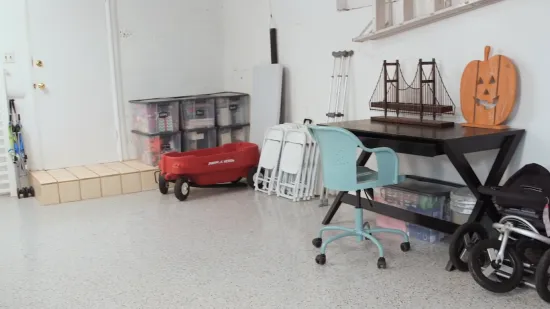
Sweep and Clear Out Any Unwanted Items
Clean your garage, basement, or attic by thoroughly sweeping the floors. Remove any accumulated dust, dirt, or cobwebs. Once the sweeping is done, it’s time to tackle clutter. Identify items that are no longer needed or used. This could include old furniture, outdated electronics, unused sports equipment, or boxes of forgotten items.
Creating separate piles for donated, sold, recycled, or discarded items is advisable. Remember to handle potentially hazardous items like old paint cans or chemicals properly. By clearing out unwanted items, you’re creating more space and ensuring a safer and more organized environment.
Organize and Box up Items You’re Keeping
Once you’ve sorted your items and identified those you wish to keep, the next step is to organize and box them up neatly. Use sturdy boxes or plastic containers with lids to protect your items from dust and potential damage.
Label each box according to its contents or the category of items. This will make future retrieval more accessible and more convenient. For additional protection, you may use bubble wrap or old newspapers for delicate or fragile items.
Properly organizing your things maximizes space and maintains a clean, orderly environment in your garage, basement, or attic.
Clean Storage Shelves or Cabinets
Cleaning storage shelves or cabinets can be a productive step towards a tidy and organized garage, basement, or attic. Start by emptying all the contents and use a microfiber cloth or a vacuum to remove dust and dirt.
If stubborn stains or grime persist, use a mild detergent or cleaning solution and scrub gently with a soft brush. Rinse with a damp cloth and let the shelves or cabinets dry completely before placing the items back. Clean or refinish all items before rearranging them on shelves or inside cabinets.
For items that need to be on hand, place them in an easily accessible location. With your shelves and cabinets cleaned and your items neatly stowed away, your space will be more organized and easier to navigate.
Preparing Appliances for the Move
Disconnect, Clean, and Dry Appliances to Prevent Mold and Odors
- Refrigerators and Freezers: Unplug at least 24 hours before moving to allow them to defrost. Once defrosted, clean the interiors with a mild detergent or baking soda solution to remove any spills or residues. Ensure to dry thoroughly to prevent mold and odors.
- Washer and Dryer: Disconnect from the wall outlets. For washing machines, turn off the water supply and drain the hoses. Clean the interior drums and dry them well.
- Dishwasher: Clear out any residual water and food particles. Run a cleaning cycle, then disconnect and allow to dry completely.
- Stove and Oven: For gas stoves, shut off the gas supply before disconnecting. Clean thoroughly, paying particular attention to burners and the oven interior.
Remember to keep all power cords securely tied and taped to their respective appliances to avoid damage or loss during the move.
Tie Down or Secure Moving Parts (e.g., Refrigerator Shelves)
Before the actual move, securing any loose or moving parts of your appliances and furniture is essential to prevent damage during transit. For instance, refrigerator shelves and drawers should be removed or securely tied down.
Final Touches Before Leaving
Sweep or Vacuum Empty Rooms One Last Time
After completing all packing and disassembling tasks, sweep or vacuum all the emptied rooms. This final cleaning round guarantees a tidy space for the next occupant and helps identify any overlooked items.
It is essential in preserving the property’s condition and potentially contributing to retrieving your security deposit if you are renting. Check hidden corners and closets beneath radiators and other often-overlooked spots.
Check Cabinets, Drawers, and Closets to Ensure Nothing Is Left Behind
Before you leave, give your cabinets, drawers, and closets a final check. Typically, these are the most overlooked areas where items are often left behind, especially those tiny, easy-to-miss things. Open each one and look through it thoroughly.
Having a flashlight to see into the back and corners might be helpful. This step is crucial to make sure you’re not leaving behind any valuables or items with sentimental value. It’s always better to double-check than to realize something is missing when you’ve relocated.
Turn off Lights, and Ensure All Windows and Doors Are Locked
The final step involves securing the property after ensuring that all items have been packed and all areas have been thoroughly checked. This involves turning off every light switch to conserve energy and avoid potential electrical hazards.
Additionally, go around the property and ensure all windows are securely closed and doors adequately locked. This step is crucial to safeguard the property and your belongings until the new occupant arrives or until the property is handed over to the property manager or the landlord.
Should I deep clean my new home before moving in?

Before you move into a new house, you should do a deep clean to remove any dirt, dust, or allergens left behind by the previous owners. This will not only make the space more inviting and livable, but it will also help you identify any areas that may require repairs or maintenance.
Hiring a professional cleaning service can be a good option if you are short on time or want a more thorough cleaning.
Can I leave some cleaning tasks for the new occupants of the house?
It is generally not advised to leave any cleaning tasks for the new house occupants. As a responsible and courteous individual, you must ensure that the house is left clean and presentable for the new occupants to settle in comfortably.
Moreover, if you have sold the house, the contract may mandate a complete clean-out before handing over the keys. Leaving cleaning tasks for the new occupants may also leave a negative impression and create an unnecessary hassle.
Ensure a Smooth Transition to Your New Home
Moving can be overwhelming, but it can be much more manageable with careful planning and meticulous preparation. You can avoid potential damage, mold, and unpleasant odors by properly disconnecting, cleaning, and drying appliances. Securing moving parts will help protect your items during transit.
Finally, once everything is moved out, a quick sweep or vacuum and a final check of cabinets, drawers, and closets can ensure nothing is left behind. With lights turned off and all windows and doors secured, you can confidently leave your old home behind, ready to settle into your new one.
Keep in mind that organization and attention to detail are key to a successful move.