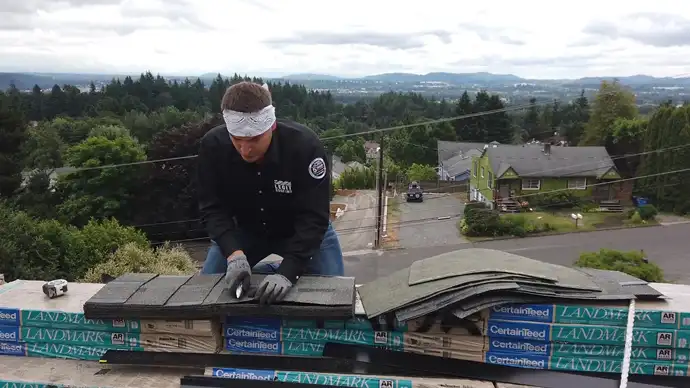
Shingles are an important part of any roofing system as they provide weather protection and help keep the elements out. To install shingles, you must cut them to the correct size and shape.
This is because if they are not cut properly, leaks can occur. It is imperative that you know how to cut shingles properly in order to ensure a proper seal. Understanding the process can make the work much easier.
Therefore, you will be able to save time and effort and receive quality results. Continue reading this article because we discuss a step-by-step procedure for cutting shingles that will enhance your roof’s appearance.
Instructions on How to Cut Shingles
The shingles on your roof play an important role in protecting your home. The importance of knowing how to properly cut this roofing material cannot be overemphasized.
A bad roofing job can lead to water damage and other costly repairs. That is why we have put together this step-by-step guide on cutting shingles like a pro. There are several ways to cut architectural shingles.
The most popular methods involve the use of a utility knife, circular saw, or tin snips. Below, we will discuss the steps involved and the use of each tool.
Step 01: Collect the Necessary Tools and Materials
Before you can start cutting shingles, you will need to gather some tools and materials.
The supplies you will need include a tape measure, a pencil, a scale, and lastly, the cutting tools. Utility knives, circular saws, and tin snips are the three most frequently used cutting tools. We will discuss the use of each cutting tool below.
Step 02: Measure the Shingles
After you have collected your tools and materials, the next step is to measure the shingles. You will need to measure both the length and width of each shingle.
This is important because you will need to know the exact size of each roof shingle in order to cut them properly.
Step 03: Mark the Shingles
Once you have measured the shingles, it is time to mark them. Using a pencil, and scale, mark the length and width of the architectural shingles. Make sure to mark them in the correct location.
Step 04: Cut the Shingles
Now comes the main part, cutting the shingles. There are several ways to cut them, but we will discuss the most popular methods below. First, we will start with the utility knife.
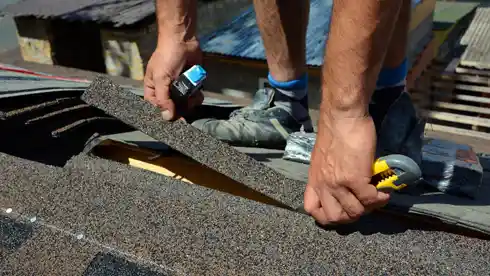
Method 1: Using a Utility Knife

The easiest way to cut architectural shingles is with a utility knife. This method is quick and easy and does not require any special skills. Here are the steps involved:
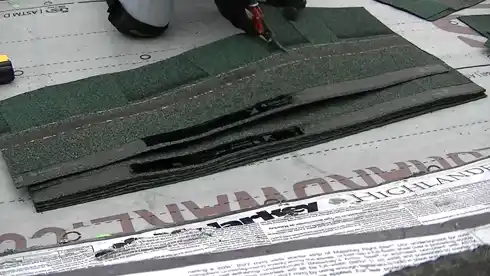
Step 01: Locate the Cut Line
The first step is to locate the cut line. This is the line where you will be cutting the shingle. Make sure to use a pencil to mark the cut line.
Step 02: Place the Shingle on a Flat Surface
Place the ridge shingle on a flat surface once you have located the cut line. This could be a workbench or the floor.
Step 03: Cut the Shingle
Now, it is time to cut the roofing shingle. Hold the utility knife firmly and make a single cut along the marked line. You can use the scale to help you make a straight cut.
Do not apply too much pressure, as this can cause the blade to break. Make sure to keep the blade sharp. As a result, you will be able to make clean, accurate cuts.
Method 2: Using a Circular Saw
Another popular way to cut shingles is with a circular saw. This method is a bit more difficult than using a utility knife, but it is still relatively easy. Generally, circular saws are used to cut larger and thicker shingles. Here are the steps involved:
Step 01: Prepare the Saw
Before you can start cutting shingles, you will need to prepare the saw. First, make sure that the saw is properly calibrated. Next, adjust the blade depth to the correct setting.
The blade depth should be set just below the shingle’s drip edge surface. By doing so, a clean-cut will be achieved. Make sure that you set the circular saw on a stable surface before you begin cutting.
For example, you might consider a workbench. If you do this, you will be able to keep the saw in place while cutting.
Connect the saw blade to the power source. Or, if you use a cordless saw, make sure the battery is fully charged.
Step 02: Locate the Cut Line
After you have prepared the saw, it is time to locate the cut line. This is the line where you will be cutting the roofing shingle. You already marked the cut line with a pencil, so it should be easy to find.
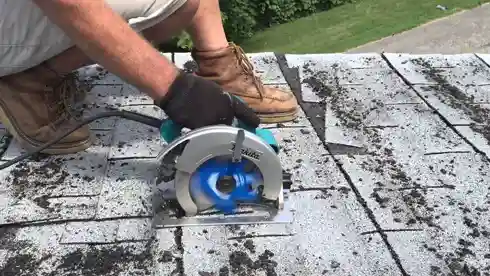
Step 03: Cut the Shingle
Now, it is time to cut the dimensional shingles. Place the shingle on a stable surface and hold the saw firmly against the roofing shingle. Apply slight pressure and begin cutting along the marked line.
Move the saw slowly and make sure to keep it in contact with the starter shingle at all times. After doing so, you will have successfully cut the shingle.
Method 3: Using Tin Snips
Alternatively, tin snips can be used to cut roofing shingles. The method is quick and easy, but it is best suited for smaller projects. Tin snips can be used to cut fiberglass, laminated shingle, and asphalt shingle.
They can also be used to cut cedar shingles. You should be careful when handling tin snips since they are incredibly sharp and powerful. Here are the steps involved:
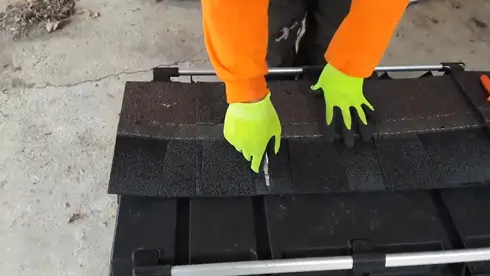
Step 01: Place the Shingle on a Flat Surface
You will need a flat surface to place the shingle on for this method. The surface should be stable and large enough to accommodate the entire roofing shingle.
Step 02: Cut the roofing shingle
Once the shingle is in place, use the tin snips to cut along the marked line. Make sure to hold the snips firmly. Take your time and make sure that you do not slip. This could lead to serious injury.
Each of the three methods listed above can be used to cut shingles. However, you can use whichever method is most comfortable for you. In the end, it is important to make sure that the roofing shingle is cut correctly so that a proper seal can be achieved.
Safety Precautions When Cutting Shingles
When cutting shingles, it is important to take safety precautions. Here are a few tips to keep in mind:
1. Always wear safety glasses when cutting shingles or roof tiles. This will protect your eyes from debris that may fly up.
2. Make sure the area is well-ventilated. When working with asphalt roofing shingles, fumes may be released.
3. Keep children and pets away from the work area. This is a dangerous activity and it is best to keep everyone out of harm’s way.
4. Wear gloves when handling sharp objects such as tin snips and utility knives. This will protect your hands from cuts and scratches.
5. Work slowly and carefully. Accidents can happen if you are not careful. So take your time and be cautious when working with scissors, knives, and saws.
6. Make sure the straight blade on the utility knife is sharp. Dull blades can cause inaccurate cuts and increase the risk of injury.
Conclusion
Cutting shingles is a necessary step in roofing. Hopefully, you are clear on how to cut shingles in these three ways. Cutting shingles can be a dangerous activity if you are not careful.
By following the safety precautions listed above, you can minimize the risk of injury. Be sure to use the most comfortable method for you and work slowly and carefully. In the end, you will be able to cut shingle like a pro.