Have you ever had a screw come loose in your shower wall and leak water? It’s not only annoying, but it can also lead to serious damage if left unchecked. If water gets into these holes, it can cause all sorts of problems, including peeling paint, mold growth, and structural damage.
So, It’s essential to seal any screw holes that might exist in your shower wall waterproofing membrane. This will not only prevent water from leaking in but also help keep the membrane in place. So, it’s important to consider how to seal screw holes in shower wall waterproofing membranes.
Sealing screw holes is a relatively simple process requiring little knowledge and the right materials. Continue reading to learn everything you need to know about sealing the screw holes in the waterproofing membrane surrounding shower walls.
How to Seal Screw Holes In Shower Wall Waterproofing Membrane: 4 Steps
Now that we’ve gone over the basics let’s get into the nitty-gritty of sealing screw holes in waterproofing membranes. There are a few different ways to do this, and the method you choose will depend on the materials you have on hand and the hole size.
Materials Needed:
- Razor knife or putty knife
- Caulking gun
- Silicone caulk
- Clean rags or paper towels
- Disposable gloves
- Pencil or marker
- Screwdriver
- Painters tape
- Level
Now that you have all the needed materials, here is the step-by-step process:
Step 1: Locate the Hole
The first step is to locate the hole that needs to be sealed. This sounds like a no-brainer, but it’s important to make sure you know exactly where the hole is located. If possible, try to avoid sealing over any grout lines. Once the location of the screw holes has been determined, use a marker or pencil to mark the area around it.
This will help to ensure that the sealant is applied evenly. Finally, mask off the surrounding area with painter’s tape. This will help to avoid making a mess during the actual sealing process.
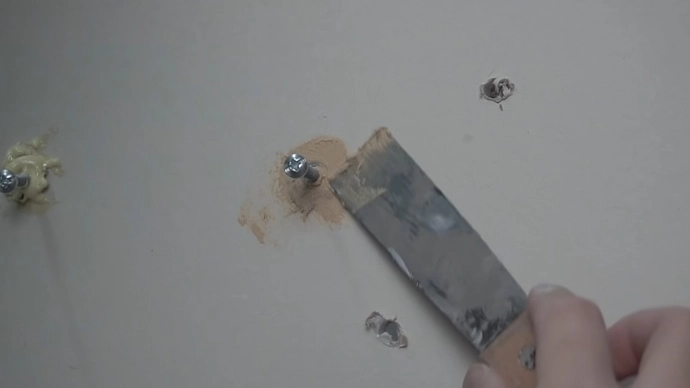
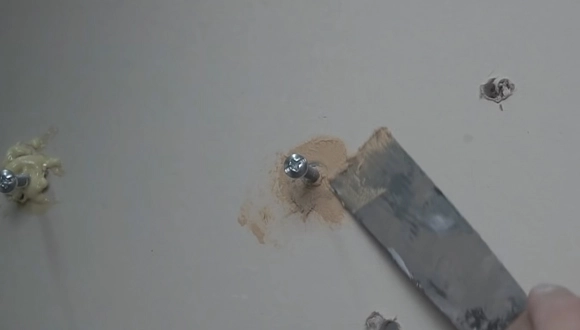
Step 2: Prep the Area
Once you’ve located and marked the hole, it’s time to prep the area for sealing. It is important to take the time to properly prep the area. The hole might look small, but it can be tricky to work with if it’s not properly prepped.
To prep the area, start by cleaning the surface around the hole. Use a mild cleaner and a soft cloth to avoid damaging the waterproofing membrane. Once the area is clean, dry it thoroughly. If there is any mildew present, treat it with an appropriate cleaner before proceeding.
Next, use a putty knife or another sharp tool to remove any loose material from around the hole. Do this carefully so as not to damage the surrounding area. Once the area is clean and dry, you’re ready to move on to sealing the screw hole.
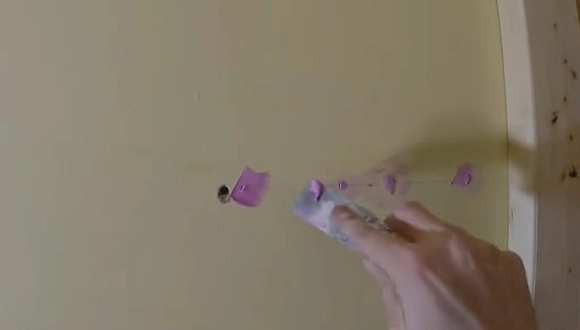
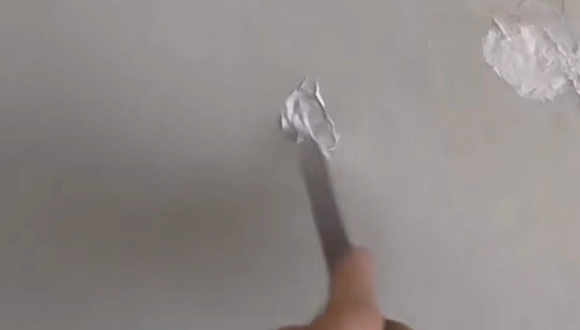
Step 3: Apply the Caulk
After the hole has been prepped, it’s time to apply the caulk. Begin by loading a tube of silicone caulk into a caulking gun. You can also use another type of sealant if you prefer, but silicone caulk is ideal for this application.
You should cut the caulk tube at an angle of 45 degrees. This will help to ensure an even bead of caulk is applied. Next, apply the caulk around the hole. Start by placing a small amount in the center of the hole and then spreading it outwards.
Use your finger or a putty knife to smooth out the caulk as you go. Work slowly and carefully until the hole is completely filled. Wipe away any excess caulk with a clean rag or paper towel.
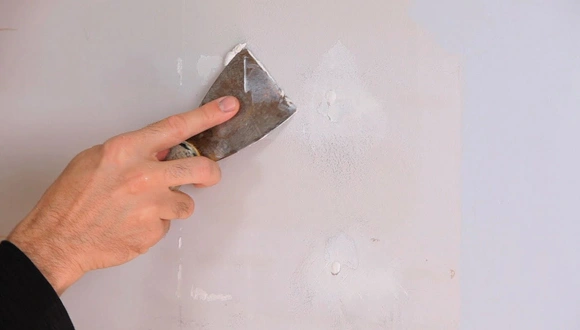
Step 4: Let It Dry
Once the caulk has been applied, it’s important to let it dry completely before using the shower system. Depending on the type of caulk you’ve used, this can take anywhere from 24 to 48 hours. If possible, try to avoid getting the area wet during this time.
Once the caulk has dried, remove the painter’s tape and dispose of it properly. You can now use the shower as usual. Just be sure to check the caulking periodically to ensure that it is still in good condition.
Can You Put Screw Through a Waterproof Membrane?
Screwing or drilling through waterproof membranes is possible, but it’s important to take the necessary precautions to ensure that the area stays watertight.
Waterproof membranes are installed to prevent water from seeping into areas that can cause damage. Screws can be inserted through a waterproof membrane, which will create a potential point of water entry. So, drilling and screwing into waterproofed areas should be done with caution.
Aside from that, any holes that are created should be properly sealed in order to maintain the integrity of the membrane. So, if you do decide to go this route, make sure you understand the risks involved.
Why Did Waterproofing Membranes Fail On Shower Walls?
Waterproofing membranes are typically made of a plastic sheet that’s adhered to the wall with mortar or other adhesive. The problem is that these membranes can fail, and when they do, water leaks into the wall cavity and causes all sorts of problems.
Here are some of the most common reasons why waterproofing membranes fail:
1. Poor Installation:
Waterproofing membranes can fail if they are not installed correctly. There are several reasons why poor installation can lead to failure, but the most common cause is incorrect bonding between the membrane and the substrate. When the bond is not strong enough, water can seep through gaps and cause the membrane to fail.
Membrane punctures and tears are also common causes of failure. Punctures can be caused during installation if the membrane is not handled carefully, and tears can occur when the membrane is not adequately supported during curing. Inadequate curing can also lead to membrane shrinkage and cracking. Also, using too much or too little sealant can lead to failure.
If there is too much sealant, it can create a barrier that prevents water from properly draining away. On the other hand, if there is too little sealant, water can penetrate the membrane and cause it to deteriorate. Water can also seep through poorly sealed tiles and damage membranes if they are not properly sealed.
2. Chemical Damage:
One of the most common problems with shower waterproofing membranes is that they can be easily damaged by chemicals. Cleaners and disinfectants are common sources of chemical damage. When these chemicals come into contact with the membrane, they can break down the material and cause it to become brittle and cracked.
This type of damage is often seen in shower walls, where cleaners are frequently used. Acidic substances can also damage membranes when they come into contact with them. These substances can eat away the material, causing it to deteriorate and eventually fail.
3. Wrong Drainage System:
Another common problem that can lead to waterproofing failure is using the wrong drainage system. Many people mistakenly believe that all drains are created equal, but this is not the case. If you have a shower drain that is not designed for use alongside a waterproof membrane, it can cause the membrane to fail.
The wrong drainage system can allow water to build up and moisten the membrane, causing it to deteriorate. Additionally, if water can bypass the membrane and seep into the wall cavity, many problems can occur, including fungus growth, wood rot, and structural damage.
4: Substrate Movement:
Substrate movement is a major problem that can cause waterproofing membranes to fail on shower walls. This occurs when the materials that the membrane is adhered to move, resulting in cracks and gaps. This can be caused by various factors, including thermal expansion, ground settlement upheaval, or even improper installation.
As substrates move, the waterproofing membrane is put under stress, and it can eventually fail. To prevent this problem, it is important to ensure that the substrates are properly supported and securely in place before installing the membrane.
5: Improperly Cured Membrane:
One common reason that shower wall waterproofing membranes fail is due to improper curing of the membrane. To ensure proper adhesion and cure, the membrane must be applied to clean, dry surfaces following the manufacturer’s instructions. Water or other wet materials should not be introduced to the membrane until it has cured for a specified time.
If the membrane is not properly cured, it may not adhere correctly to the surface and could allow water to seep through, leading to leaks and damage. In some cases, improperly cured membranes may also develop cracks or holes over time, increasing the risk of water damage.
The lifespan of a membrane can also be the reason for waterproofing failure. Although most membranes are designed to last for many years, some may last even less if they are not properly maintained.
Does Thinset Seal Screw Holes In Waterproof Membranes?
Thinset is a popular type of mortar used in tile installation. It is made from a mixture of Portland cement, sand, and water. While thin set mortar is strong and durable, it does not adhere well to waterproof membranes. This can be a problem if you are trying to install ceramic tile on a surface that has a waterproofing membrane.
If you use a pre-mixed thinset mortar, it will not adhere well to the waterproofing membrane. This can cause the wall tile to come loose and eventually fall off. If you are installing shower tile on a surface with a waterproofing membrane, it is important to use a thinset that is specifically designed for this purpose.
Is it worth sealing screw holes in shower walls?
Yes, repairing shower walls with screw holes is definitely worth it. Screw holes in the shower base are often the weakest point in the waterproofing membrane since they provide a direct path for water to enter. By doing so, you can extend the life of your waterproofing membrane and avoid costly repairs.
Overall, sealing screw holes is a simple and inexpensive way to protect your investment and avoid costly repairs. So, now that you know how to seal screw holes in shower wall waterproofing membranes, all that’s left to do is get started. Follow the instructions above and make sure you use the right materials.
Recommended Article To Read: