Dealing with an oversized driveshaft? It’s such a pain, and we all go through this. However, you can easily shorten the driveshaft at your home. A lot of people will tell you to go to the store to do it.
That’s because if it’s not done properly, the driveshaft may get obsolete. But with our instructions, you can do it quite easily. Besides, you’ll save some money too. So, let’s learn how to shorten a driveshaft.
Warnings
People suggest you go to a shop to shorten the driveshaft for a few reasons. There are few things you need to be aware of before you start. That’s because if you fail to maintain these properly, you likely end up damaging the driveshaft. The issues are:
● Length
First, maintaining the length of the driveshaft. People often fail to measure the length correctly. Don’t worry; we’ll share some tips with you regarding the measurements in a moment.
● Balance
Cutting the wrong side can destroy the balance of the driveshaft. Though it’s tough to maintain full balance, you can have the maximum possible results. Follow our guide carefully to avoid such mistakes.
● Square
It depends on your expertise. While you’re cutting, you should try your best to make it perfect. If you do that properly, the squareness will be okay.
Tips to Measure Correctly
A lot of people fail to measure the shaft correctly. Therefore, they end up with the wrong size. Sometimes even damaging the shaft. Therefore, here we have some tips for you. These will help you to get the correct measurements.
- When you’re taking measurements, fix the car in a flat position. Besides, the full weight should be on the suspension.
- Place the yoke into the transmission. Ensure that it’s in its usual position. After that, measure from transmission center to rear center yoke. However, if you previously used the yoke, you’ll find a ring that shows where it normally rides. With it, you can easily measure how much you want to remove.
- Ensure that u-joints are correctly aligned when welding. Failing to do so can disturb the measurements.
The measurement process is simple if you know how to do it. Therefore, understand the point above properly and only then proceed to work. Or else you may damage your driveshaft.
Required Tools
Before you start, you need to have some tools to do the job properly. It’s better to prepare them early so that you can do your job smoothly. The tools and materials you’ll need:
- MIG Welder: Usual welding machines will not do the job for you. You need a tough machine that can produce some adjustable heat. However, you don’t need much heat as the driveshaft isn’t too thick.
- Angle Iron: It will help you to keep the driveshaft straight.
- Cutoff Saw: Any regular cutoff saw can do the job for you. It depends on you, how perfectly you make the square.
- Air Hammer Attachment: It will drive the yoke and u-joint cap down.
- Angle Grinder: It will assist you with cleaning up the welding.
- Scuff Pad & A Bevel: To clean the edges after cutting.
- Ring Pliers
Once you have all the tools ready, you can start working.
Shorten A Driveshaft: Steps to follow
Shortening a driveshaft is an easy process. But you’ve to be highly careful. Even a tiny mistake can ruin all the hard work. Therefore, we suggest you follow the steps with extreme caution. Please read the instructions slowly and understand what we say.
Now get into the work.
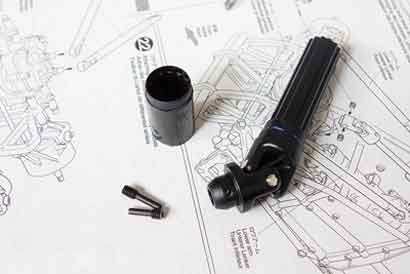
Step 1: Remove the U-joint cap
First, unlock the ring with the pliers. Then use the hammer attachment to loosen it. After that, the u-joint cap should come out easily.
Step 2: Mark the Length on the Driveshaft
You need to do this step perfectly to avoid imbalance. Get a tape and a marker. After that, mark every inch of the shaft. Besides, broadly mark the inches in the middle of the driveshaft where you’ll cut. Don’t think of cutting the edge. You have to cut from the middle and join them later. Not to mention, properly create a ring with the marker, which will help to have a straight cut.
Step 3: Cut the Driveshaft
Before you run your saw on the driveshaft, ensure that you have laid it straight. Take help of the angle iron here. After that, cut the middle of the driveshaft where you marked it with the marker. Do it slowly but don’t cut in angle. If you do that, you won’t be able to join the driveshaft properly.
Step 4: Clean the Edges
For better penetration, clean the edges where you made the cut. Use a scuff pad for that. You also can use a bevel for a better finish. Once you feel it’s smooth, continue to the final step.
Step 5: Welding
Now, hold the two pieces of the shaft together properly. Then start welding with the MIG welder. At first, weld three or four sides of the joint to ensure they stick together. After that, you can do the welding work more perfectly.
And you’re done. You have successfully shortened your driveshaft all by yourself. Hope you’ve found this article helpful. Though it seems easy to shorten a driveshaft, you should do everything carefully. It will help you to do the job perfectly. Besides, you will have a correct-sized driveshaft.