It’s hot outside, and you want to make a delicious cold drink, except you don’t have any ice. You could go out and buy a bag of ice, but that will just melt and turn your drink watery. A pellet ice maker is a great way to obtain ice for cold drinks.
It uses small pellets of ice instead of hard ice cubes. Pellet ice is made by compressing water under high pressure until it turns into solid ice. This type of ice is very smooth and has a higher surface-area-to-volume ratio than regular ice cubes.
But how to use pellet ice maker for best results and make sure the ice doesn’t melt too fast?
Throughout this article, we’ll explain the actual process of using pellet ice makers at home. Let’s get started.
Steps on How to Use Pellet Ice Maker for Best Results
Pellets of ice have a natural shape that makes them easier to fit into glasses or cups. If you are looking for a unique way to enjoy your drinks, then a pellet ice maker is perfect. You need to take the following steps to get the best results:
Step 01: Choose the Right Ice Maker
When it comes to choosing the right pellet ice maker for your home, there are a few things you’ll need to take into account.
First, consider how much ice you’ll need on a daily basis. If you often entertain or have a large family, you’ll need an ice maker that can keep up with demand.
Second, think about where you’ll be placing the ice maker. If you have limited space in your kitchen, you may want to opt for a portable ice maker that can be stored away when not in use.
Finally, consider your budget. Ice makers can range in price from a few hundred dollars to several thousand, so it’s important to choose one that fits your needs and budget.
Step 02: Prepare the Water
Water is the main ingredient in any ice maker’s pellets, so it’s important to choose a good water source that will produce high-quality pellets. Most pellet ice makers require filtered or distilled water, as these types of water have fewer impurities that can affect the taste and quality of the ice.
When using filtered or distilled water, be sure to change the filter regularly to ensure that the water is still clean and free of contaminants. If you notice that your ice maker is producing less-than-perfect pellets, changing the water source or filters may be time.
Step 03: Add the Water to the Ice Maker
Next, add the prepared water to the ice maker according to the manufacturer’s instructions. Be sure not to overfill the reservoir, as this can cause problems with the ice-making process.
If your ice maker has a self-cleaning cycle, be sure to run it before adding water to the reservoir. This will help remove any built-up mineral deposits that could affect the quality of the ice.
Step 04: Turn on the Ice Maker
After the water has been added, turn on the ice maker and let it do its job. Set a timer for the desired amount of time, and then let the machine run until it’s finished.
Make sure your electrical outlet is working properly and that the ice maker is plugged in correctly. Check the manufacturer’s manual for troubleshooting tips if the ice maker doesn’t seem to be working.
Step 05: Wait for the Ice to Form
Now, it’s time to wait for the ice to form. This process can take anywhere from 10 minutes to 30 minutes, depending on the type of ice maker you’re using.
During this time, you can ready your glasses or cups and any other ingredients you’ll need for your cold drinks.
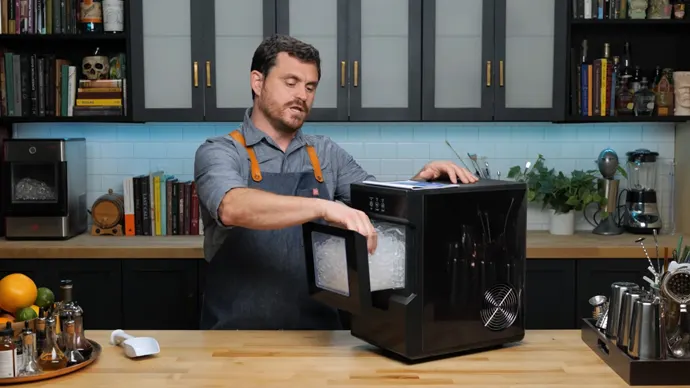
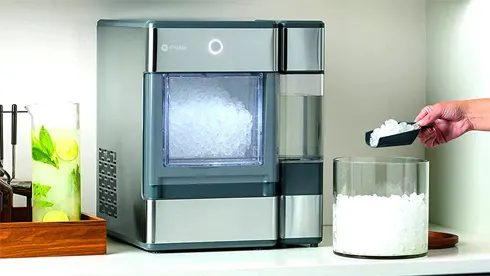
Step 06: Harvest the Ice
Once the pellets are frozen solid, it’s time to harvest them. Most pellet ice makers come with a scoop or other tool to help you transfer the pellets from the machine to your glasses or cups. Be sure to handle the pellets carefully, as they can break easily if dropped.
Step 07: Add Your Favorite Beverage
Now, it’s time to add your favorite beverage and enjoy your refreshingly cold drink. First, add a few pellets of ice to your glass or cup. Then, pour in your drink of choice and finally enjoy your favorite cold drinks without worrying about making a mess.
Now that you know how to use a pellet ice maker at your home, it’s time to put these tips into practice. Get started today and enjoy delicious cold drinks all summer long.
Why Should You Use Pellet Ice Maker?
Pellet ice makers are becoming increasingly popular for a number of reasons. The following are some key benefits of using a pellet ice maker:
Pellet Ice is More Versatile
One of the biggest advantages of pellet ice is that it’s more versatile than other types of ice. Pellet ice can be used for everything from cocktails and mixed drinks to iced coffee and smoothies.
Pellet ice is also the perfect size for most blenders, so you can easily make icy drinks without having to worry about chunks of ice getting stuck in the blades.
Pellet Ice Melts More Slowly
Another advantage of pellet ice is that it melts more slowly than other types of ice. This means that your drinks will stay cold longer, and you won’t have to worry about them getting watered down.
Pellet Ice is Easy to Use
Pellet ice makers are also easy to use, so you’ll be able to make icy drinks with ease. Most pellet ice makers come with an automatic shut-off feature, so you won’t have to worry about overfilling the reservoir.
Pellet Ice is More Affordable
Finally, pellet ice makers are more affordable than other types of ice makers. This means that you’ll be able to save money on your electric bill, and you won’t have to spend as much on ice cubes.
Now that you know some of the key benefits of using a pellet ice maker, it’s time to get one for your home. Pellet ice makers are available at most major retailers, so you should be able to find one that fits your budget and needs.
How Do You Make Sure the Ice Doesn’t Melt Too Quickly?
If you’re worried about the ice melting too quickly, there are a few things you can do to prevent this from happening.
1. Use Tin Foil
One of the easiest ways to keep the ice from melting too quickly is to use tin foil. Simply place a piece of tin foil over the top of your glass or cup and then add the pellet ice. The tin foil will help to keep the heat out, which will prevent the ice from melting as quickly.
2. Put Your Glass in the Freezer
Another easy way to keep the ice from melting too quickly is to put your glass in the freezer for a few minutes before adding the pellet ice. This will help to lower the temperature of the glass, which will prevent the ice from melting as quickly.
3. Use Ice Boxes
If you’re having a party or other event where you’ll need a lot of ice, it’s a good idea to use an icebox. The iceboxes are great for keeping the ice from melting too quickly and they can also help to keep your drinks cold.
Tips for Maintain Pellet Ice Makers
While pellet ice makers are relatively easy to use and maintain, there are a few things you can do to keep yours in tip-top condition.
Tip #1: Keep It Clean
One of the most important things you can do to maintain your pellet ice maker is to keep it clean. Be sure to clean the machine according to the manufacturer’s instructions, and don’t forget to clean the filters regularly.
Tip #2: Descaling
Another important maintenance task is descaling. This process removes built-up mineral deposits that can affect the quality of your ice. Most pellet ice makers come with a descaling solution, or you can use vinegar or lemon juice.
Tip #3: Check for Leaks
Be sure to check your pellet ice maker for leaks on a regular basis. If you notice any leaks, be sure to repair them immediately.
Tip #4: Store It Properly
When you’re not using your pellet ice maker, be sure to store it properly. Most pellet ice makers come with storage bags or containers, which can help keep your pellets fresh and prevent freezer burn.
Frequently Asked Questions
You should know a few things before you buy a pellet ice maker. The following are some frequently asked questions that can help you make the best decision for your needs:
1. What Is the Difference between Pellet Ice and Nugget Ice?
Pellet ice and nugget ice is the same thing; they are just different names for the same product. Pellet ice is also sometimes called “chewable ice” or “crushed ice.”
2. What Is the Difference between Pellet Ice and Bullet Ice?
There is one major difference between pellet ice and bullet ice. Pellet ice is soft and easy to chew, while bullet ice is hard and difficult to chew. Pellet ice is made up of small, round pieces that are easy to bite into, making them ideal for drinks like smoothies or slushies.
3. Should the Metal Arm of an Ice Maker Be Up Or Down?
The metal arm of an ice maker should be in the down position to allow the ice maker to continue making ice. If the arm is in the up position, this signifies to the ice maker that the ice storage bucket is full and turns the ice maker off.
4. Can I Leave My Ice Maker on All the Time?
If you’re looking for a constant supply of ice, you’ll need to leave your ice maker plugged in and running all the time. Like your refrigerator or freezer, it needs to be on to keep your ice supply stocked. However, if you’ll only occasionally use your ice maker, you can turn it off when not in use to save energy.
Conclusion
Pellet ice makers are a great way to get the ice you need for all your favorite drinks. Keep the tips and information in this article in mind to choose the right pellet ice maker for your home and to keep it running smoothly.
Your pellet ice maker will provide you with years of refreshing icy drinks with a little care and maintenance. Just be sure to keep it clean and descaled, check it for leaks regularly, and store it properly when not in use.
Now that you know everything there is to know about pellet ice makers, it’s time to get one for your home. Happy icy drinks.