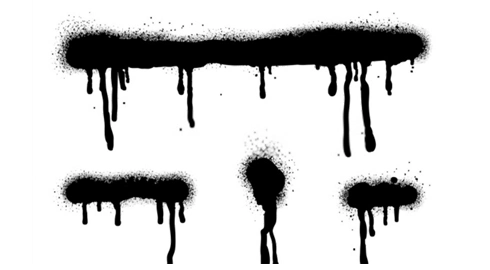
Spray paint lines are an eyesore that can make even the most well-kept object or surface look unkempt. If the painting is not correctly completed, however, it may result in unattractive paint lines. In such instances, the painted object will appear aesthetically poor, sloppy, and unfinished. It may also be arduous to clean or remove the paint lines.
To obtain smooth finishing results without streaks, you should know how to get rid of spray marks, what causes them, and the proper way to apply paint. We will discuss all of this so that you can achieve the desired results for the upcoming painting project.
What Causes Paint Lines When Spray Painting?
There are a number of reasons why you might need to know what causes spray paint lines. For one, if you’re planning on painting a surface, you’ll want to avoid any unsightly lines. Additionally, if you’re trying to achieve a professional-looking paint job, understanding the causes of spray paint lines can help you avoid them.
If you’re troubleshooting a paint job that has gone wrong, knowing the root cause of the problem can save you time and effort in fixing it. It is important to familiarize yourself with the issues relating to spray paint lines. We’ll go over some of the most common ones below.
1. Incorrect Painting Technique
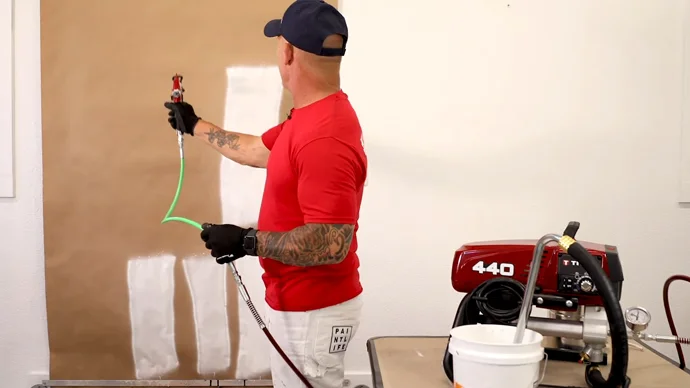
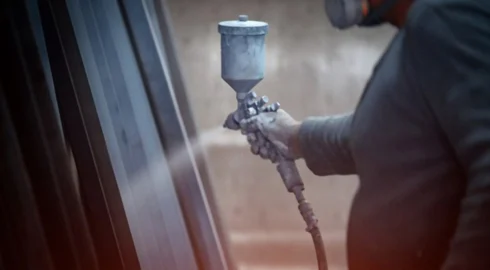
If you’ve ever had paint lines appear in your spray-painted finish, it’s likely due to an incorrect painting technique. When spray painting, it is important to use the appropriate painting methodology to avoid paint lines.
If you hold the spray can too close to the surface that you are painting, you will find yourself painting in too thick of a coating. In this instance, the paint will be applied too thinly and will not cover evenly if the spray can is held too far from the surface.
Furthermore, if you move the paint sprayer too rapidly, it won’t have time to adhere evenly to the surface, which will result in streaks. To avoid this, it is best to practice your spray painting technique on a piece of scrap paper or cardboard before you begin painting your project. By taking these precautions, you can ensure that your finished product will be free of paint lines.
Related: What kind of paint sprayer is used with an air compressor?
2. Improper Paint Gun Pressure
While using a spray gun, remember to apply the proper pressure. High pressure will cause the pigment to be atomized into very small droplets. This can result in a great deal of overspray, which in turn may cause smudge lines.
In order to prevent this from happening, make sure to use the recommended pressure for your particular paint gun. You can find this information in the paint gun’s instruction manual.
3. Use of Old or Damaged Paint
It’s also common for paint lines to occur when you use old, expired products. When the paint is stored for long periods of time, it can become thick and clumpy. This can make it difficult to apply evenly to a surface, resulting in paint lines.
In addition, if the paint is old, it may not adhere to the surface as well as it should. This can also cause paint lines. Hence, make sure you use fresh paint that is in good condition in order to avoid this problem.
4. Defective Paint Gun
Another common cause is a faulty paint gun. There may be an issue with the paint gun mixing the paint thoroughly, resulting in streaks. Also, the paint gun may not be able to evenly distribute the paint, resulting in an uneven finish.
An issue may exist with the paint gun’s ability to control the amount of paint being sprayed, resulting in an uneven coat of paint. If you are having trouble with your paint job, check to see if your paint gun is the cause. In this case, consider replacing it with a new one.
How to Get Rid of Spray Paint Lines : Step-By-Step Guide
Now that we have discussed the various causes of paint lines let’s look at how to eliminate them. If you have already applied paint to your surface and have noticed paint lines, don’t despair. You can fix the problem in a few ways. We have outlined a step-by-step guide below to help you to fix blotchy spray paint. So, let’s get started.
Step 01: Collect the Supplies
In order to remove those unsightly paint lines, you’ll need to gather a few supplies. You will need a chemical paint stripper to perform the main work of removing paint. The sandpaper will also be required for smoothing the surface after the stripper has been applied. Painter’s tape, a putty knife, and large paper sheets are also necessary for this project. After you have gathered all of the supplies, you are ready to begin.
Step 02: Prepare the Area
The second step to removing spray paint marks is to prepare the surrounding area. This means clearing away any debris, such as leaves or sticks, and making sure the surface is smooth.
Use painters tape to cover any areas that you do not want to color. Next, use big paper sheets to cover the ground. As a result, you will be able to protect the floor from paint drips or spills. Finally, be sure to open any windows and doors to ventilate the area.
As a result, you will be able to protect the floor from paint drips or spills. Finally, be sure to open any windows and doors to ventilate the area.
Step 03: Apply the Paint Stripper
After you have prepped the area, it is time to apply the paint stripper. Be sure to read the instructions on the paint stripper can before beginning. When using a paint stripper, always take care to protect your skin and eyes from contact with the chemical.
Be sure to work in a well-ventilated area and avoid inhaling the fumes. To use a paint stripper, simply apply a generous amount of gel to the surface with a paintbrush. This will help to make certain that the stripper comes into contact with all of the coating that needs to be removed.
Step 04: Wait for the Stripper to Work
You should wait for the paint stripper to work after applying it. Depending on your product, it may take between a minute to 24 hours for it to work its magic.
That’s why it’s important to read the manufacturer’s instructions carefully before getting started. Once the stripper has had a chance to work, you should be able to scrape off the paint easily with a putty knife or other sharp tool.
In the event that the paint is still stubborn, you may need to reapply the stripper and wait a little longer. But eventually, with a little patience, it will be possible for you to remove all of the unwanted stains.
Step 05: Sand the Surface
Once you’ve applied the stripper and allowed it to work, it’s time to start sanding. You’ll want to use fine-grit sandpaper for this step, as anything too coarse will damage the surface. Start by sanding in the direction of the grain, and be sure to go over the entire surface evenly.
If there are any areas that seem particularly resistant, you can apply more stripper and let it sit for a minute or two before sanding again. This will help to create a smooth finish.
Step 06: Clean the Surface
You should thoroughly clean the surface after sanding it. This will remove any debris or dust that may have been left behind. Also, it’ll make sure the new paint adheres well.
To clean the surface, simply wipe it down with a cloth. Please use a clean, lint-free cloth to avoid leaving any unwanted fibers behind.
Step 07: Remove the Tape
Now that the surface is clean, it’s time to remove the tape. Be very careful as you peel it off so that you don’t accidentally remove any of the paint along with the tape. If there are any stubborn pieces of tape that refuse to come off, you can use a putty knife or other sharp object to gently scrape them away. Once all the tape has been removed, you should have a nice, clean line where your paint stopped.
Step 08: Apply a New Coat of Paint
It is now possible to paint the surface after it has been prepared. Use quality paint and spray gun that adheres effectively to the surface.
Be sure to apply it evenly as well. Take special care to eliminate paint lines. Apply the paint at a medium speed and spray from a distance that is moderate. Don’t go too fast or too slow. If you do this, no streak lines will appear.
Step 09: Let the Paint Dry
Ensure that the paint has dried completely before moving on to the next step. The paint will not adhere properly to a wet surface and will begin to peel if it is applied before the surface is completely dry. In addition, the paint may become brittle and crack over time. Drying painted surfaces also helps to ensure that the paint color is uniform and streak-free.
When painting in humid conditions, it is especially important to allow the paint to dry thoroughly before applying a second coat. Otherwise, the new paint will not properly bond with the old paint, and the finish will be uneven.
By taking the time to dry the paint after each coat, you can ensure a high-quality finish that will last for a long time. Depending on the type of paint being used, this can take anywhere from a few hours to a day or two. This will make certain that the paint is completely dry and will not smear or run.
Step 10: Apply Another Coat of Paint
After allowing the paint to dry, you may go over the finished surface once more. By doing so, it will be easier to cover up any lines or imperfections that may still be visible.
When applying the second coat, be sure to use long, even strokes. Once the second coat is dry, you should have a smooth, even surface. If you are still not satisfied, you can always apply a third coat of paint.
However, keep in mind that three coats of paint may start to look thick and uneven. Therefore, it is recommended that you use two coats whenever possible.
Make sure that the paint dries properly. As a result, you will have a beautifully painted surface that is free of imperfections and lines.
Frequently Asked Questions:
When it comes to spray paint, there are a few questions that are often asked. Here are a few of the most common questions, along with their answers:
1. Can I Use a Nail Polish Remover to Eliminate the Paint?
A nail polish remover can be used to remove paint. This is because the acetone in the nail polish remover will dissolve the paint. It is important to test the nail polish remover on a small area first to make sure it does not damage the surface underneath the paint.
To remove the paint, apply the nail polish remover to a cotton ball and rub it over the area with the paint. The paint should come off easily. However, you should be aware that nail polish remover is quite harsh. It is the best idea to use a paint stripper whenever possible as it is much gentler.
2. How Long Will a Spray Paint Last?
Spray paint’s lifespan can vary greatly depending on the brand, the type of paint, and how it is used. Generally speaking. However, most spray paints will last for around three years before they start to degrade. This is due to the fact that the solvents in the paint begin to evaporate over time, causing the pigments to become less vibrant and the paint itself to become thinner.
Additionally, exposure to sunlight or other sources of heat can shorten the life expectancy of spray paint. As a result, if you want your spray paint to last as long as possible, it is important to store the painted object away from direct sunlight. With proper care, your spray paint should be able to provide years of use.
3. How Long is the Shelf Life of Spray Paint?
Most types of spray paint have a shelf life of about 2 to 3 years. Unopened cans of paint will last for 2 or 3 years when stored in a cool, dry place. Once a can of paint is opened, it should be used within six months to verify that the quality of the paint is not compromised. To extend the life of an opened paint can, store it in a cool, dark place and remember to tightly seal the lid after each use.
When stored properly, open cans of spray paint last for up to 12 months. However, it is imperative to note that if the paint has been exposed to extreme temperatures or sunlight, its shelf life will be significantly reduced.
4. Can I Use Spray Paint on Fabric?
You can use spray paint on fabric, but there are a few things to remember. First, you need to select the right type of paint. There are specific fabric paints available, or you can use regular spray paint if you add a fabric protector. You need to prepare the fabric by pre-washing it and then stretching it tight.
Otherwise, the paint will soak into the fabric and create an uneven finish. Be sure to test the paint in an inconspicuous spot before applying it to the entire piece of fabric. With a little care and preparation, you can easily use spray paint to add color and pattern to any fabric surface.
Conclusion
Spray paint can be a great way to achieve a professional-looking finish. It’s important to take your time and follow the proper steps to ensure that the results are perfect.
We hope you have a comprehensive understanding of how to get rid of spray paint lines. Just remember to be patient, use quality paint, and follow the steps outlined in this article. This will help you achieve beautiful, smooth results.
You Might Be Interested: Can you spray paint clear plastic bins?