Installing shiplap walls is a popular trend in home decor right now. They can add a rustic touch to any room. As a result, you may want to install shiplap walls.
But what if your walls are already covered in drywall? You don’t have to tear them down and start from scratch.
Installing shiplap over drywall is a relatively easy process, but you need to know how to install shiplap walls over drywall.
In this article, we’ll walk you through the steps involved in installing shiplap over drywall, as well as some tips for ensuring a smooth, seamless finish. Keep reading to discover a simple and effective way to install shiplap walls over drywall.
Instruction on How to Install Shiplap Walls Over Drywall
Any room can benefit from the addition of shiplap walls, which add a touch of elegance and rustic charm.
They can also be a great way to cover up imperfections in your walls. If your walls are covered in drywall, don’t worry, you can still install shiplap. Simply follow the steps below.
Step 01: Collect All the Supplies You Will Need
Before you get started, make sure you have all the supplies you will need. This includes shiplap boards, crown molding, table saw, jigsaw, measuring tape, level, stud finder, 18 gauge brad nail gun, 1 3/4 to 2 1/4 inch nails, pencil, caulk, caulk gun, wood filler, paint, paintbrush, putty knife, sander, etc.
In this way, you can ensure that you have everything on hand and can avoid interruptions during the project.
Step 02: Measure the Area
After you have gathered all of your supplies, you need to measure the area you will be installing the shiplap wall over the drywall. This will help you to determine how many boards you need and what size they should be.
You can use a measuring tape to measure the height, width, and length of the wall. These measurements will give you the square footage of the wall.
Step 03: Find the Studs
Once you have the square footage of the wall, you need to find the studs. This is an important step, as you will need to nail the boards to the studs. You can use a stud finder to locate them.
Once you have found the studs, mark them with a pencil. By doing this, you can ensure that the boards are properly aligned.
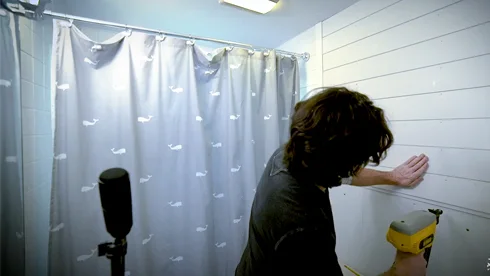
Step 04: Cut the Shiplap
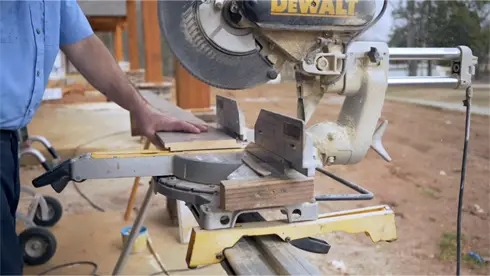
Now that you have all of the measurements, you can start to cut the shiplap board. Use a table saw or a jigsaw to cut them to the desired size. Make sure to measure twice and cut once, as mistakes can be costly.
To ensure a seamless appearance, all of the boards should be the same size. If you need to cut curves, you may wish to use a jigsaw. Make a mark on the board at the desired length for cutting straight lines.
Using a level, draw a straight line perpendicular to the mark. Place the board on the table saw and cut along the line. Maintain a constant blade height to ensure a clean, even cut.
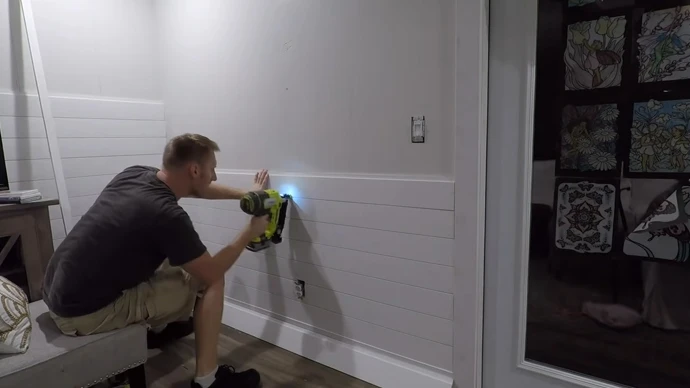
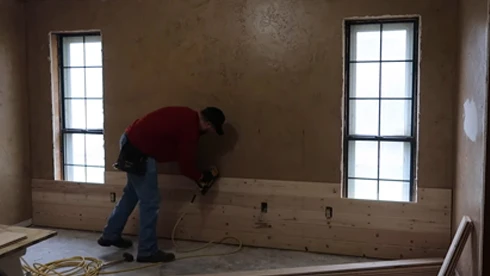
Step 05: Assemble the Shiplap
Having cut the boards to size, you can begin assembling the shiplap wall. Begin by nailing one end of a board to a stud.
Make sure it is level before nailing it in place. Then, use a nail gun to attach the other end of the board to another stud. Repeat this process until the entire wall is covered.
In order to ensure that the boards are aligned correctly, you should start your work from the bottom up.
Make sure that you leave sufficient space at the bottom for the installation of the crown molding. Do not forget to leave the same space between each board for caulking.
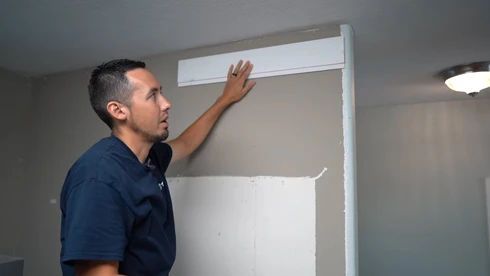
Step 06: Install Crown Molding
Once the shiplap wall is in place, you can install the crown molding. This will add a finishing touch to the wall. Measure and cut the crown molding to size. Then, use a nail gun to attach it to the wall. Make sure that it is level before nailing it in place.
Step 07: Apply the Wood Putty
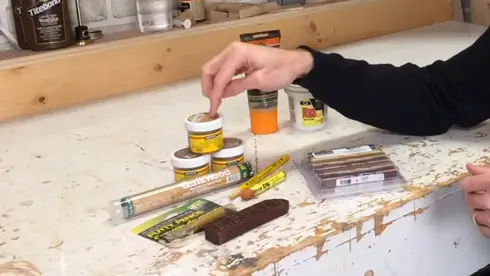
In order to seal the seams, it is necessary to apply wood putty once the boards have been installed over the drywall. This will help to conceal the nail hole and give the wall a finished appearance.
Use a putty knife to apply the putty, then use sandpaper to smooth it out. In this manner, the putty will be flush with the boards.
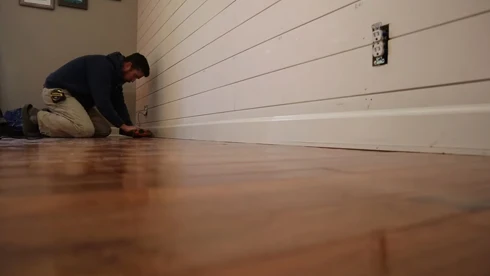
Step 08: Caulk the Seams
Once the putty has been applied, you can caulk the seams. Use a caulking gun to apply caulk to the joints between the boards.
Make sure to fill in all of the cracks and crevices. Then, use a putty knife to smooth it out. Allow the caulk to dry before painting. This will give you a finished and polished look.
Step 09: Sand the Wall
When the caulk has dried, you may sand the wall. Use a sander to smooth out any rough areas.
This will give the wall a finished appearance. Clean the surface with a dry brush after sanding. The dust and debris will be removed in this manner. As a result, the wall is now ready for painting.
Step 10: Paint the Wall
Now that the wall is sanded and cleaned, you can paint it. Choose a color that complements your decor. Apply the paint in a thin coat.
Use a roller for even coverage. Allow the paint to dry before applying a second coat. In this way, you can achieve a professional finish. Make sure that all boards are covered with paint for a uniform appearance.
Assembling ship lap walls may seem daunting, but it can be a breeze with the right tools and instructions. By following these simple steps, you can have a beautiful accent wall.
Precautions to Follow When Working With Shiplap
During the process of installing the vertical shiplap board, there are a few safety precautions you should take.
Doing so will ensure that the project proceeds smoothly and without any accidents. The following safety tips should be considered:
1. Wear Safety Goggles
When you are sawing or nailing the boards, you face a risk of debris flying into your eyes. It is therefore imperative that you wear safety goggles. This will prevent debris from getting into your eyes and causing injury.
2. Wear a Dust Mask
The dust that is generated during the sanding of the boards poses a health risk. To protect your lungs, wear a dust mask. This will keep the dust from entering your lungs and causing any health problems.
3. Wear Gloves
There is a possibility that you will come into contact with sharp edges while handling the boards. To protect your hands, wear gloves. This will prevent cuts and scratches from occurring.
4. Keep Children and Pets Away
During the DIY shiplap installation process, it is important to keep children and pets away from the work area. This is because there is a risk of injury if they come into contact with the tools or the boards.
5. Be Careful When Using Power Tools
Be careful and take your time when using power tools, such as a saw or a drill. Do not put yourself in danger by trying to hurry through the project. Accidents can easily occur if you are not paying attention.
By following these safety tips, you can avoid any accidents while installing shiplap walls. As a result, the project will be completed safely and without any problems.
Benefits of Installing Shiplap Walls
Shiplap walls have become a popular choice for homeowners nowadays. This is because they offer several benefits. Some of the benefits of installing true shiplap walls include:
1. Design
One of the main benefits of shiplap walls is their design. They add a touch of elegance and sophistication to any room. In addition, they can be used to create a rustic or farmhouse look.
2. Easy Installation
Shiplap walls are easy to install, even for a novice. With the right tools and instructions, anyone can install them in a short amount of time.
So, if you are looking for a quick and easy way to update your home decor, faux shiplap walls are the solution.
3. Durability
Compared to other types of walls, shiplap walls are very durable and can withstand a great deal of wear and tear. This makes them a good choice for high traffic areas. They will not chip or peel easily, making them a long-lasting investment.
4. Versatile
Another benefit of shiplap walls is their versatility. They can be used in a variety of settings, including kitchens, bathrooms, and bedrooms. In this way, they can easily be adapted to fit any decor style.
5. Low Maintenance
Another advantage of shiplap walls is that they are low maintenance. Once they are installed, you do not have to worry about them deteriorating or becoming damaged. All you need to do is give them an occasional wipe down to keep them looking fresh.
6. Eco-friendly
Shiplap walls are also eco-friendly. This is because they are made from wood, which is a natural material. In addition, they are biodegradable, so you can rest assured that they will not harm the environment.
It can be seen that there are many benefits associated with the installation of shiplap walls in your home. They are a quick and easy way to update your decor, and they offer a number of features that other types of walls do not.
So, if you are considering installing shiplap walls, go ahead and do it. You will not be disappointed.
How to Clean Shiplap Walls?
Once your shiplap walls are installed, you will need to know how to clean them properly. This is because they will inevitably get dirty over time. By following these simple steps, you can keep your shiplap walls looking fresh and new:
Step 01: Collect Your Supplies
Before you can clean your shiplap walls, you will need to gather some supplies. These include a brush, bucket, sponge, microfiber cloth, vinegar, and water.
Step 02: Mix the Vinegar and Water
In a bucket, mix 1 cup of vinegar with 2 cups of warm water. This will create a cleaning solution that is safe for your shiplap walls. Vinegar is eco-friendly and biodegradable, so it is good to clean walls.
Step 03: Dust Off the Walls
Use a brush to dust off the walls. This will remove any loose dirt or debris that is on the surface. This will make it easier to clean the walls later on.
Step 04: Soak the Sponge In the Cleaning Solution
After the walls are dust-free, soak a sponge in the cleaning solution. Be sure to wring out any excess water before applying it to the walls. In this way, the cleaning solution will not drip down the walls.
Step 05: Clean the Walls
Gently scrub the walls with a sponge. Be sure to apply gentle pressure to any dirt or stains that are present. Do this until the stains disappear. If the stains are tough to remove, you can reapply the cleaning solution and let it sit for a few minutes.
Step 06: Wipe Down the Walls
Once the walls are clean, use a dry microfiber cloth to wipe them down. This will remove any cleaning solution that is still present. Be sure to dry the walls completely to prevent any watermarks from forming.
By following these simple steps, you can keep your shiplap walls looking fresh and new. Just be sure to clean them routinely to prevent any build-up of dirt and dust.
Frequently Asked Questions:
There are some questions that are commonly asked about shiplap walls. Here are some of the most common ones:
1. Does Shiplap Need to Be Glued?
Using adhesive is not necessary when installing shiplap over existing drywall. If you prefer, you can use adhesive and nails for a more secure installation. It is up to you whether to use an adhesive.
2. What Material Is Used to Make Shiplap?
Shiplap can be made from wood, plywood, or medium-density fiberboard (MDF), depending on the manufacturer. Moreover, all of these materials are eco-friendly and biodegradable.
3. How Long Do Shiplap Walls Last?
The lifespan of the product depends on the materials used to manufacture it as well as how well it is maintained. In general, shiplap walls should last for many years with proper care.
4. How Often Do I Need to Clean My Shiplap Walls?
You should clean your shiplap walls at least once or twice a month to prevent any build-up of dirt and dust. By doing this, your walls will stay looking fresh and new.
Conclusion
As you can see, installing shiplap walls in your home offers many advantages. They are a quick and easy way to update your decor, and they offer a number of features that other types of walls do not.
Our hope is that you already understand how to install shiplap walls over drywall after reading this article. So if you’re considering this trend for your home, be sure to try it out.
You Might be Interested: