Every shed owner knows that proper maintenance is key to keeping your shed in good condition. But did you know that one of the most important parts of maintaining your shed is sealing the floor? If not sealed correctly, moisture and rain can seep in, rotting the wood and rusting the metal.
You can protect your belongings from the elements by sealing a shed with concrete. When you seal your shed’s floor, you create a barrier that protects the shed from moisture, pests, and other elements that can damage the shed over time. Watertight and insulated sheds can be made by sealing any gaps or cracks.
If you’re not sure how to seal a shed to concrete, don’t worry, we have got you covered. You’ll get walked through the steps, so you can rest assured that your shed is protected from the elements.
How to Seal a Shed to Concrete: DIY Steps Guide
If you’re looking for a shed that will last, you can’t go wrong with one that’s sealed to concrete. You need to take the time to seal your shed properly, but the results are worth it. Here’s a step-by-step guide to sealing your shed to concrete:
Tools and Materials Needed:
- Silicone caulk
- Putty knife
- Tape measure
- Roller or brush
- Caulking gun (optional)
- Plywood sheets (optional)
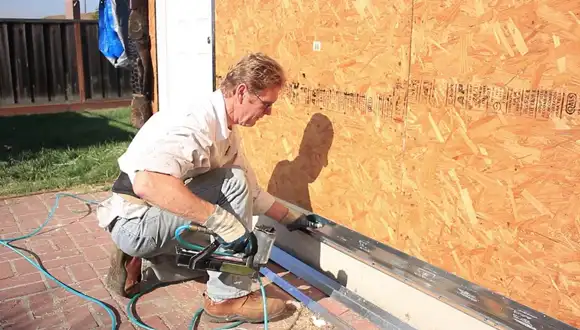
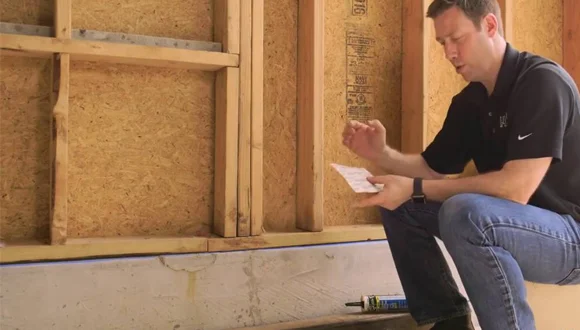
Step One: Inspect the Shed
Before you begin, take a good look at the shed and make a list of any damage that needs to be repaired. Look for cracks in the walls or roof, rotted boards, or gaps where insects could get in. When you know what needs to be done, gather the supplies you’ll need to get the job done right.
You may also need pry bars, hammers, screwdrivers, and saws in addition to sealant and caulking. Ensure that the doors and windows close properly and are well insulated. It may be necessary to replace them if they are not.
Step Two: Measure the Cracks and Gaps
Once you’ve inspected the shed, use a tape measure to determine the size of the cracks and gaps. You will need to spend some time measuring the cracks and gaps. This will help you determine how much caulk or silicone you’ll need to seal the garden shed.
To measure cracks and gaps, use a tape measurer to get the dimensions of each one. Then, use a pencil to mark the measurements on a piece of paper. Once you have all of the dimensions, add them up so that you know how much concrete sealant you’ll need.
Step Three: Choose the Right Caulk or Silicone
Before sealing a shed, caulk or silicone must be chosen carefully. There are a few things to consider when making your choice. Durable urethane caulk and 100% silicone sealant are the best options for most applications. Also, there are a few things to keep in mind when making your choice.
Think about the weather and temperature extremes your shed will be exposed to. If you live in an area with extreme temperatures, you’ll need a sealant that can handle it. The second thing you should consider is how much movement your shed will get.
It will be best if you choose a caulk or silicone with a high degree of flexibility if it is subject to a lot of movement. You should also think about how long the sealant should last.
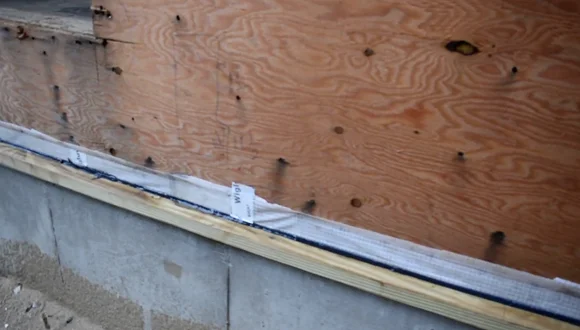
Step Four: Prepare the Area
After selecting your caulk or silicone, it’s time to prepare the area. Before starting any caulking project, ensure the surface is prepared properly. In the case of sealing a shed to concrete, this means cleaning the surface and making sure there is a smooth, even surface for the caulk or silicone to adhere to.
Any contaminants, particles, or paint flakes will make it harder for the sealant to stick, so it’s essential to remove them before you start. Once the area is clean, you can proceed with the next step.
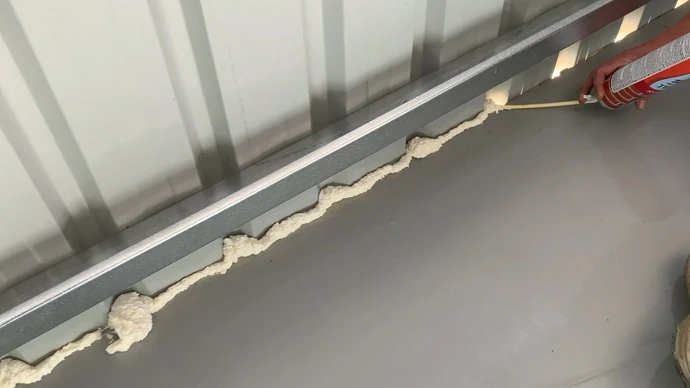
Step Five: Apply the Caulk or Silicone
Now that the area is prepared, you can start caulking or sealing. Start cutting the tip at a 45-degree angle if you’re using caulk. Then, load the urethane caulk into a caulking gun if you’re using one. If you don’t have a caulking gun, simply hold the tube in your hand and squeeze as you go.
Start at one end of the crack or gap when you’re ready to apply the durable urethane caulk or silicone sealant. Apply the silicone or caulk to the joint using a slow and steady motion. Make sure you’re applying it evenly to create a good seal. You can smooth it out with a spoon or your finger.
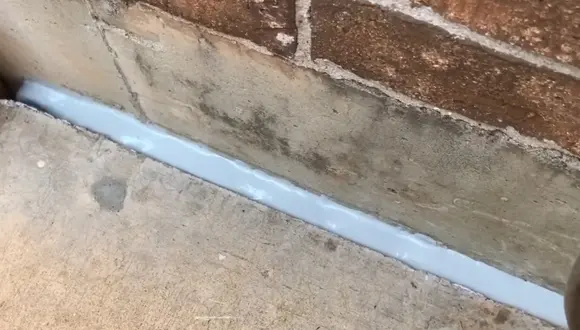
Step Six: Allow the Caulk or Silicone to Dry
Once you’ve prepared the surface and applied the caulk or silicone, the next step is to allow it to dry completely. Depending on your product, this can take anywhere from a few hours to a few days. Once properly dry, your shed will be better sealed against moisture and pests.
In the meantime, be sure to keep an eye on the area and avoid walking or placing any objects on it. If everything goes according to plan, you’ll have a better-sealed shed that will last for years to come.
Why Do You Need to Seal the Concrete Shed Base?
There are a few reasons the concrete shed base needs to be sealed. A concrete shed base is the most common type of foundation for sheds. It’s durable and level, which makes it ideal for supporting a shed.
Listed below are some reasons for sealing the concrete shed base:
To Prevent Erosion: A concrete shed base can also be susceptible to erosion. Over time, rain and snow can wear away at the concrete, causing it to crack and crumble. If left unchecked, this erosion can eventually cause the shed to collapse.
For Pest Control: Pests like rodents and insects can squeeze through tiny openings in the shed’s foundation. If there are cracks or gaps in the shed’s foundation, pests can easily get into your shed. Sealing the concrete around your shed keeps pests away.
Enhancing Energy Efficiency: Sealing the concrete helps to insulate the shed, making it more energy efficient. In summer, the sealed concrete will help to keep the shed cooler. It will keep the garden shed warmer in winter due to the sealed concrete.
For Insulating the Shed: In hot climates, the concrete can absorb heat from the sun and transfer it to the shed. This can make the shed unbearably hot, causing damage to your belongings. Keeping the shed at a comfortable temperature can be achieved by sealing the concrete.
Now that you know why it is necessary to seal a concrete shed base let’s walk through the steps on how to do it.
Can You Seal a Shed Straight Onto Concrete?
The answer is yes because concrete is the ideal foundation for a shed. Pouring a concrete slab for your shed will provide a level, durable surface for you to build on. It is possible to erect a shed directly over an existing concrete slab, but it is usually best to seal the concrete first.
Whether you’re building a new shed or refurbishing an old one, concrete provides a solid base that will support the structure of your shed in the long run. If you’re erecting your shed directly on an existing concrete slab, it is necessary to seal the concrete.
Sealing the concrete will also make it easier to clean the concrete floor of your shed in the future. Applying a sealant is a simple process and can be done with a brush or roller. Once the sealant has been applied, you can begin building your shed.
Should Sealing a Shed Be Raised Off the Ground?
There are many things to consider when it comes to sheds. One crucial question is whether or not the shed needs to be raised. The sheds that are raised off the ground typically have a better seal since they aren’t in contact with the ground.
There are a few reasons why this is generally recommended. To begin with, it reduces the accumulation of moisture around the bottom of the shed. This is important because moisture can lead to rot and other damage to the shed over time.
It’s also essential to raise a shed to ensure proper water drainage and ventilation beneath it. This is important because it helps to keep the shed drier and cooler, which can extend its lifespan. A shed floor should typically be between 4″ and 8″ inches off the ground. It will also need to be supported appropriately so it doesn’t sink over time.
Do I Need a Concrete Pad While Sealing a Shed?
If you’re planning on getting a shed, one of the first questions you need to answer is whether or not you need a concrete pad. A shed without a built-in floor will need a concrete pad to provide a level surface and support the weight of the shed.
A concrete pad will give your shed the stability it needs to withstand strong winds and other external forces. It can also act as an insulator, keeping your shed cooler in summer and warmer in winter. You need to ensure that the concrete pad is properly cured before erecting your shed on top of it.
So, now that you know all about how to seal a shed to concrete plus the benefits of doing so, what are you waiting for? It’s time to get started on your project. Follow the steps outlined above and choose the right products for the job.
A Similar Topic:
- What is the best way to fill large gaps in concrete steps and brick walls?
- Why does concrete sealant have an odor?
- How long do concrete sealers last on concrete sinks?