As bird lovers, maintaining a functional and aesthetically pleasing bird bath is crucial. However, the concrete structure may begin to crack over time. This can cause water leakage and ruin the birdbath’s overall appearance. Consequently, if you wish to ensure the longevity of your bird bath, you must seal cracks.
To seal a cracked concrete birdbath, you must assess the cracks and determine how and what to use to seal them. In the next step, prepare the bird birth and then apply the sealer. By doing this, the cracks in bird birth will be repaired. You may repaint it according to its previous color if you wish.
To provide your feathered friends with a safe and attractive water source, we will guide you through sealing cracks in your concrete bird bath.
How to Seal Cracked Concrete Bird Bath? – STEP-BY-STEP Procedures
STEP 1. Choose a Dry and Warm Environment
STEP 2. Clean the Bird Bath Thoroughly
STEP 3. Assess the Cracks and Determine
STEP 4. Prepare the Silicone Caulk and Caulk Gun
STEP 5. Apply the Silicone Caulk
STEP 6. Smooth Out the Caulk for a Neat Seal
STEP 7. Allow the Caulk to Dry
STEP 8. Paint the Caulk (if needed)
If you have a cracked concrete birdbath, you are not alone. Concrete bird baths are prone to cracking due to their porous material and exposure to the elements. But this doesn’t mean you must toss it out and buy a new one. You can seal the cracks with a few steps and restore your bird bath.
Follow these steps to seal a cracked concrete bird bath:
STEP 1. Choose a Dry and Warm Environment
To ensure a successful seal, creating a cozy and inviting space for your DIY project is essential, complete with comfortable warmth and dryness. To facilitate proper sealant curing, find a dry and warm environment, preferably above 68 to 76 degrees Fahrenheit.
You can work indoors or outdoors if the area is moisture-free and has adequate ventilation. A warm and dry environment ensures the sealant cures properly and adheres to the surface. This way, you’ll prevent further cracks or damage to the birdbath.
STEP 2. Clean the Bird Bath Thoroughly
Now clean away years of grime and gunk with a powerful mix of acidic cleaner and warm water. Mix the acidic concrete cleaner with warm water in a bucket and scrub the bird bath thoroughly with a stiff-bristled brush.
Make sure to get into all the nooks and crannies of the bird bath, including the base, bowl, and any decorative elements. Once you’ve scrubbed the bird bath thoroughly, rinse it off with clean water and let it dry completely.
This step is crucial to ensure the sealant properly attaches to the concrete surface. Don’t rush the drying process using a heat source, as this can cause cracking or damage to the bird bath.
STEP 3. Assess the Cracks and Determine
Now it’s time to take a closer look at the cracks and figure out what needs to be done. If you notice small hairline cracks, you can easily proceed with sealing them individually.
But if the cracks are larger and water seeps through the entire surface, it might need sealant. Before proceeding, the sealant you choose must be bird-safe. Don’t use products containing toxins or chemicals that could harm the birds.
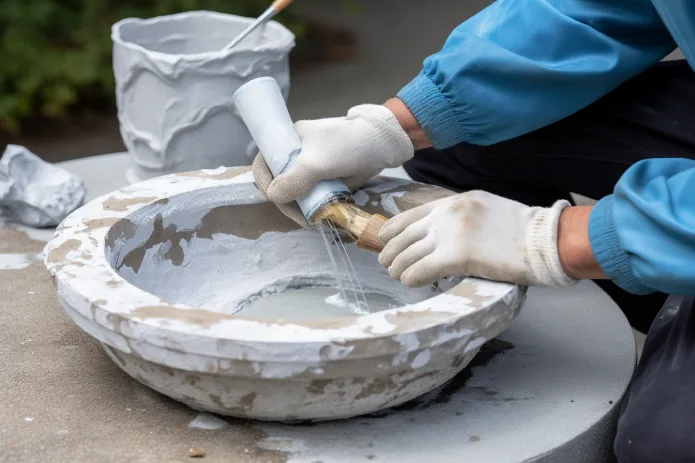
STEP 4. Prepare the Silicone Caulk and Caulk Gun
To start, take your utility knife and cut the caulk tube’s tip at a 45-degree angle. This will allow for accurate application and a smoother finish. Next, insert the tube into your caulk gun for better control during the sealing process. Ensure the gun securely holds the tube before moving to the next step.
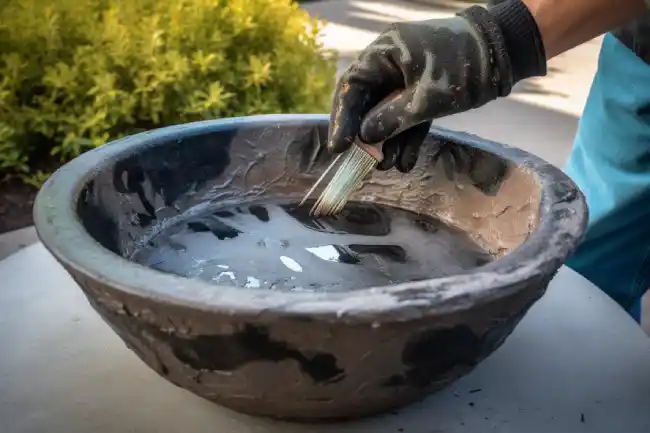
STEP 5. Apply the Silicone Caulk
Apply the silicone caulk with precision and care to transform your bird bath into a luxurious oasis. Follow these helpful tips to ensure a successful application:
- Apply the silicone caulk directly into the cracks or along the entire inner surface of the bird bath if necessary.
- Use a smooth, continuous motion to ensure even distribution.
- Be careful not to overfill the cracks or create excess sealant that could affect the aesthetics of the bird bath.
- Use a caulking gun to apply the caulk for better control and accuracy.
- Keep a damp cloth nearby to clean up any excess caulk.
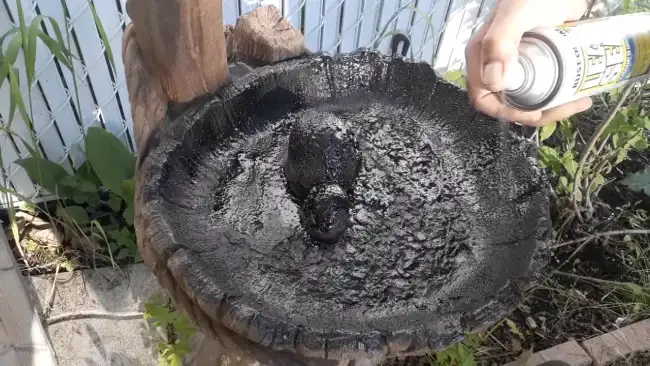
STEP 6. Smooth Out the Caulk for a Neat Seal
Achieving a flawless finish is easy with a caulk smoothing tool or your finger. You can create a neat and uniform appearance. Simply dip your finger in soapy water, take the tool or your finger, and gently run it along the caulk.
Press down lightly to remove excess caulk and ensure it is evenly spread out. Pay close attention to any cracks or gaps that may be present as you smooth out the caulk.
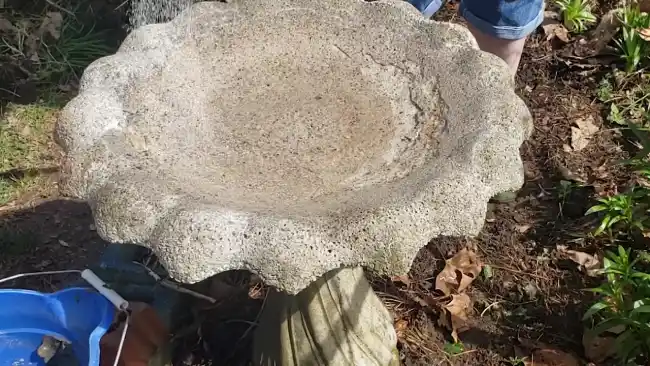
STEP 7. Allow the Caulk to Dry
Now that you’ve finished smoothing out the caulk, it’s time to let it dry completely. The curing process typically takes several hours or even up to a day, depending on the specific product used. During this time, ensure the bird bath remains undisturbed and protected from moisture or debris.
STEP 8. Paint the Caulk (if needed)
If you want to add a final touch to your project, you can paint the caulk to match the color of your bird bath. This step is optional but will help the caulk blend in with the rest of the bird bath.
Make sure the caulk is completely dry. Then use waterproof paint suitable for concrete surfaces. Apply the paint carefully, using a small brush or roller. To get the right result, you might have to apply multiple coats.
Why do concrete birdbaths crack?
Concrete birdbaths are a common backyard addition that is both functional and beautiful. But fluctuations in temperature can lead to unsightly and problematic fractures.
The reason for this is that concrete is porous, and it absorbs water, which expands when frozen. Over time, this expansion can cause a lot of pressure on the surrounding materials, leading to cracks.
Here are some factors that can contribute to cracking:
- Exposure to extreme temperatures, especially freezing and thawing cycles.
- Not sealing the birdbath allows water to penetrate and weaken the concrete.
- Poor drainage can cause water to pool and pressure the birdbath’s base.
- Placing heavy objects on the birdbath, such as large statues or rocks, can cause cracks or collapse.
What should I do before repairing a concrete birdbath?
Before repairing a concrete birdbath, clean it thoroughly using an acidic concrete cleaner to dissolve stains and dirt. Use warm water to activate the concrete cleaner for better cleaning results.
Also, use a scrub brush to remove dirt and loose concrete around the cracks. This will allow you to see better the damage’s extent and how much work will be required to fix the birdbath.
After cleaning the birdbath, inspect it to see how deep the cracks go and how severe the damage is. If the cracks are small, you can use a concrete sealer to fill them in. But if the cracks are deep and water seeps through, you may need a concrete patching compound to fix the issue.
What should I do for larger cracks or holes in a concrete birdbath?
If you find bigger gaps or holes in your favorite birdbath, use polyester resin and cream hardener to fill and repair it.
Clean and dry the area to be repaired. Then, mix the resin and hardener according to the manufacturer’s instructions and apply it to the damaged area. Smooth the surface with a putty knife and let it dry completely before sanding it to ensure a smooth finish.
Depending on the gap size or hole, you may need to apply multiple coats until completely filled. By repairing larger cracks or holes with polyester resin and cream hardener, you can prevent water from seeping through and causing further damage to your birdbath.
How should I seal hairline cracks in a concrete birdbath?
For the safety of your feathered friends, consider the toxicity before using any products to cover up those tiny lines on your birdbath. While sealing or epoxy paint can seal hairline cracks, choosing a product safe for birds is important.
Here are some tips to help you safely seal hairline cracks in your concrete birdbath:
- Choose a non-toxic sealer or paint that’s safe for birds.
- Clean the birdbath thoroughly before applying the sealer or paint.
- Apply the sealer or paint according to the manufacturer’s instructions.
- Let the sealer or paint dry completely before allowing birds to use the birdbath.
How long should I let the patched birdbath dry after repair?
When you patch the cracks in the birdbath, allowing it to dry completely before use is necessary. Let the patched birdbath dry for a couple of hours and cover it with a plastic sheet overnight for proper curing.
This is because the curing process needs time to set and strengthen the patch. Also, allowing the patch to dry overnight is the best way to ensure it has fully cured before use.
Make Your Cracked Concrete Birdbath Look Neat and Uniform by Sealing it
Sealing a cracked concrete birdbath becomes easy and straightforward by following the steps outlined in this blog post. Properly assessing and cleaning the bath, preparing the appropriate sealant, and meticulously applying it is crucial to achieving a neat and uniform seal.
With the bath properly sealed and thoroughly cured, the birds can enjoy a refreshing dip in a safe and functional bird bath. Don’t wait for the cracks to spread and cause further damage; seal them immediately.
So, as you bask in the irony of your repaired concrete bird bath, remember that even the toughest materials need a little TLC occasionally.