We all know that concrete planters are the unsung heroes of our gardens, standing guard and showcasing our beloved plants all year long. But like all soldiers, they need a bit of protection. Sealing your concrete planters can do wonders in ensuring they stay beautiful and sturdy for years to come.
With a little bit of effort, you can give your soldiers the coat of armor they deserve. To begin with, you need to clean the planter thoroughly, then prepare a work surface and the sealant. And after that, it’s time to apply the sealant to the planter.
So, let’s dive into the process and learn how to seal your concrete planters like a pro.
How to Seal Concrete Planters: 8 Steps
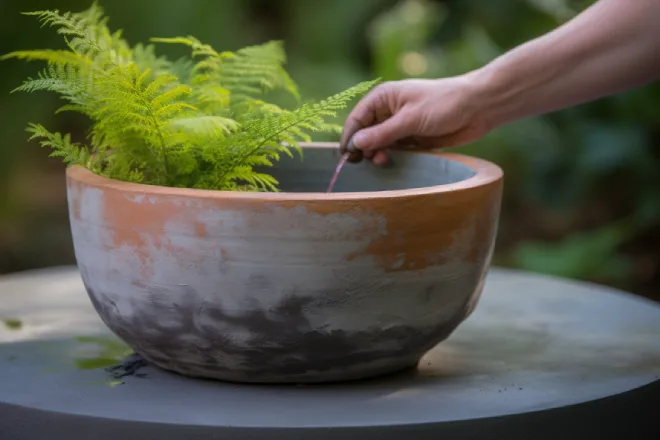
Step 1: Clean the Planter
Grab some dish detergent and a scrubber to get that planter sparkling clean. Spray a small amount of water onto a scrubber and add a few drops of dish detergent to the planter.
Next, clean the planter inside and out to get rid of any dirt, grime, leftover soil, and plant materials. This is an important step because any leftover debris can compromise the sealant’s effectiveness.
Once you have cleaned the planter, rinse both the inside and outside with water and allow it to dry for two to three days in a sunny location with no exposure to water.
Step 2: Prepare the Work Surface
To prepare the work surface for your planter, you’ll need to grab a plastic tarp or newspaper to line your sturdy work surface. This will help protect your workspace from spills or drips during sealing.
Once your work surface is covered, slip a wood block under each end of the planter to raise it off the drop cloth surface. This will prevent the planter from sticking to the work surface when sealing the bottom edges and make it easier to apply the sealant evenly.
To proceed to the next step, ensure your work surface is completely covered and the planter is securely propped up on the wood blocks.
Step 3: Prepare the Sealant
Now it’s time to get the sealant ready, so give that can a good shake and pop it open with a trusty screwdriver. Before mixing, ensure the area is well-ventilated to avoid inhaling any fumes.
Insert a long-handled paint stirrer into the sealant and stir thoroughly down to the bottom of the can. You want to ensure the sealant’s well-mixed so it’ll have an even consistency when you apply it to the concrete planter. Mix the sealant well for at least 5 minutes before applying.
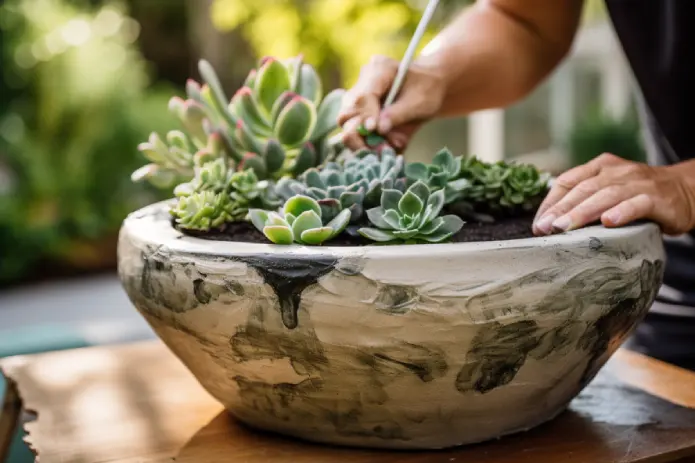
Step 4: Apply Sealant to the Inside of the Planter
Using your paintbrush to dip into the sealant and carefully dab off any excess, you can visualize how it will provide a protective barrier and prolong the life of your garden container. It’s important to seal the inside of the planter first to prevent any moisture from seeping through and causing damage to the concrete over time.
Here are some tips to ensure you apply the sealant correctly:
- Start by sealing the corners and edges first to create a solid base for the rest of the planter.
- Use smooth, even strokes to apply the sealant, similar to painting a wall, to avoid drips and blotches.
- Work outward from the corners and edges to cover the entire inside of the planter.
- Apply a second coat if necessary once the first coat has dried completely.
- Allow the sealant to dry completely before moving on to the next step.
Step 5: Apply Sealant to the Outside of the Planter
After sealing the inside of your garden container, it’s time to move to the outside and give it a protective coat. Begin by applying a thin first coat of exterior sealant. Keep an eye on ornamental etchings’ grooves and ridges. Apply the sealant all the way to the feet of the planter.
Step 6: Apply A Second Coat
To ensure maximum protection for your garden container, it’s time to apply a second coat of sealant to both the interior and exterior once the first coat is completely dry. According to a recent study, applying a second coat of sealant can increase the lifespan of your garden container by up to 50%.
For a second coat of sealant, follow these steps:
- Use a paintbrush or roller to apply the sealant evenly.
- Apply the sealant in a thin layer to avoid drips and bubbles.
- Allow the second coat to dry completely before handling or filling the planter.
- Store any leftover sealant according to the manufacturer’s instructions.
Step 7: Allow Drying Time
Now, sit back and let your freshly sealed garden container dry for a day or two before filling it with your favorite flora. Remember, the drying time is crucial in ensuring that the sealant fully cures and provides optimal protection to your planter.
Rushing this step may result in a weaker and less effective seal, leaving your planter vulnerable to damage from water, weather, and other outdoor elements.
While waiting for the sealant to dry, keep your planter in a dry and well-ventilated area. Placing it under direct sunlight may cause the sealant to dry too quickly, leading to cracks and an uneven finish.
Step 8: Fill the Planter
Once you’ve confirmed that the planter is dry, fill it with soil. Make sure to fill it up to a level that’s suitable for the size of your plants and their root system.
After filling the planter with soil, it’s time to add your desired flowers and plants. Be sure to choose plants suitable for your climate and the amount of sunlight your planter will receive.
As you add your plants, it’s essential to ensure the soil is packed firmly around the roots to provide adequate support.
Benefits of Sealing Concrete Planters
Enhancing the appearance, extending lifespan, and protecting against environmental factors are some benefits of properly sealing your concrete planters.
Sealing prevents cracking or chipping, which can be unsightly and potentially harmful to your plants.
It also prevents stains and other unsightly blemishes, which can be especially problematic if you use the planter indoors or in a high-traffic area.
In addition to preventing moisture, UV rays, and other environmental factors from damaging your concrete planter, sealing it will ensure it lasts as long as possible. This can be especially important if you live in an area with harsh weather conditions, such as extreme temperatures, high humidity, or heavy rainfall.
Sealing your planter can help it withstand these conditions and extend its lifespan, so you can enjoy it for years. In addition to protecting your planter from environmental factors, sealing also requires less maintenance than unsealed planters.
Sealed planters are less susceptible to water damage and other problems requiring frequent cleaning or repairs. This means you can spend less time maintaining your planter and more time enjoying your plants.
Is it a good idea to waterproof concrete planters after sealing?
Waterproofing your concrete planters is like putting on a raincoat, providing an extra layer of protection against the elements and potential damage. Waterproofing your concrete planters’s a good idea to ensure they remain aesthetically pleasing and functional for a long time.
Concrete is a porous material, meaning water can easily penetrate its surface and cause damage to the planter over time. Waterproofing your concrete planters can prevent water from migrating to the outside surface of the planter and causing decorative spoiling.
It can also prevent the formation of cracks and other types of damage due to water damage.
What is the maximum cold temperature for planters?
A light freeze ranging from 29° to 32° Fahrenheit can kill tender plants, while a moderate freeze from 25° to 28° Fahrenheit is widely destructive to most vegetation. Even so, a severe or hard freeze at 25° Fahrenheit or below can damage most plants without proper sealing.
Therefore, it’s important to know the maximum cold temperature for planters. Generally, concrete planters can withstand temperatures as low as -20° Fahrenheit if they’re properly sealed or insulated. Still, this may vary depending on the concrete quality and the planter walls’ thickness.
Is Flex Seal safe for planters?
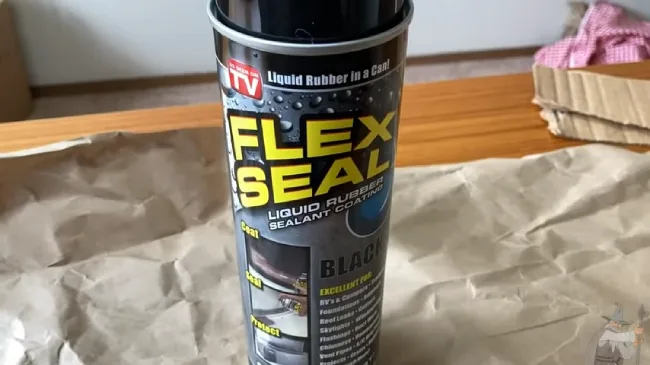
Flex Seal Liquid is a safe option to protect your plants during winter. During plummeting temperatures, the moisture in the soil can freeze and potentially harm your planters.
It’s safe for use around plants and animals once fully cured. To apply, use a paintbrush to coat the outside of your DIY Planter Box. Then, allow 24 hours of dry time before continuing.
However, by administering Flex Seal Liquid, you can effortlessly avert this damage and maintain the well-being of your plants. In addition to protecting your plants from the cold, Flex Seal Liquid is also waterproof.
This makes it an excellent choice for outdoor planters. It can help to prevent water damage and extend the life of your planters. With its easy application and long-lasting results, Flex Seal Liquid is a great choice for sealing concrete planters.
Sealed Concrete Planters: Protect Your Outdoor Space
The successful sealing of your concrete planters reflects a commendable approach to maintaining your outdoor space. Protecting your planters from the elements prevents water damage, mold growth, and discoloration.
Clearly, you understand the importance of taking the necessary steps to care for your garden’s adornments. Your concrete planters will be a beautiful and long-lasting addition to your garden, and your diligence in ensuring their longevity.