Sealing between your concrete and your house is essential, and you should never be overlooked. This is because, without proper sealing, water and moisture can seep into the gaps and cracks between the two surfaces. It can cause damage and rot to your home’s foundation and interior walls.
To seal between the concrete and the house, first measure the gap and gather your tools and materials. Afterward, clean the crack with mineral spirits and press the foam backer into the opening. Next, caulk the gap and any small or hairline cracks, then smooth the caulk.
Today we will guide you through the proper steps to seal your concrete and house to protect your home from potential damage. We will also provide tips on choosing the right caulk for the job. So, let’s get started.
How to Seal Between Concrete and House: Steps to Follow
STEP 2. Gather Your Tools and Materials
STEP 4. Press Foam Backer into the Gap
STEP 6. Caulk Small or Hairline Cracks
STEP 8. Finish and Allow Curing
Sealing between concrete and a house is an essential maintenance task that can prevent water damage, cracking, and mold. Proper sealing ensures the joint between the two surfaces remains watertight, protecting the house’s structural integrity.
If you want to seal between your concrete and house, here’s what you need to do:
STEP 1. Measure the Gap
You’ll need to grab a ruler or tape measure and get up close and personal with that pesky gap to determine how wide it is. Measure the gap at several points to ensure accuracy, as some sections may be wider than others.
Gaps smaller than 0.25 inches wide can be filled using caulk alone. While gaps that are 0.25 inches or larger in width must be filled with a foam backer rod, followed by a caulk. Once you’ve determined the width of the gap, it’s time to gather your tools and materials.
STEP 2. Gather Your Tools and Materials
With a caulk gun and foam backer rod, it’s time to assemble the rest of your gap-filling supplies.
- Grab some polyurethane caulk. This type of caulk is ideal for outdoor use as it’s resistant to weather and moisture.
- You’ll also need mineral spirits to clean up any excess caulk that may spill during application.
- Wear disposable gloves to protect your hands from the caulk and mineral spirits.
- Make sure you have a spoon or caulk-smoothing tool handy. This will help you spread the caulk evenly and ensure a smooth finish.
STEP 3. Clean the Crack
Before applying the caulk, clean the crack thoroughly with mineral spirits to ensure proper adhesion. This step is crucial to the success of your sealing job.
Mineral spirits are a solvent that can dissolve any dirt, debris, or old caulking residue that may be present in the crack. Aside from that, the mineral spirits can also help to remove any moisture that may have seeped into the crack, which can lead to premature failure of the sealant.
To clean the crack, follow these steps:
- Wear protective gloves and eye goggles to avoid any contact with the mineral spirits.
- Pour a small amount of mineral spirits onto a clean cloth.
- Rub the cloth along the length of the crack, making sure to remove all debris and residue.
- Allow the crack to dry completely before proceeding to the next step.
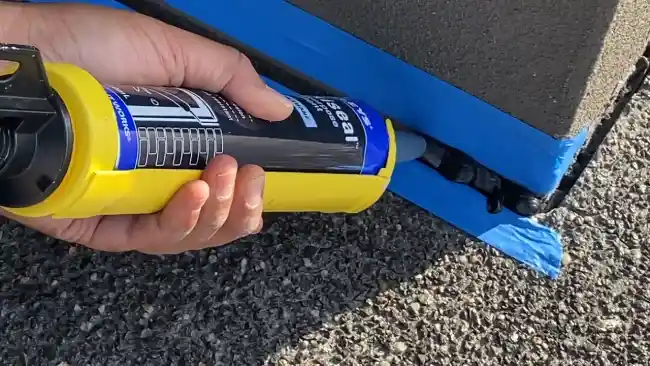
STEP 4. Press Foam Backer into the Gap
Now, press your foam backer rod firmly into the gap like a puzzle piece fitting snugly into place. Choose the right size of backer rod for the gap you’re filling. It won’t provide enough support for the caulk if it’s too small. For too large, it won’t fit properly.
Once you have the right size, cut the backer rod to the length of the gap and press it in until it sits 0.25 inches below the concrete surface. This ensures that the caulk will have enough space to expand and contract with temperature changes without cracking.
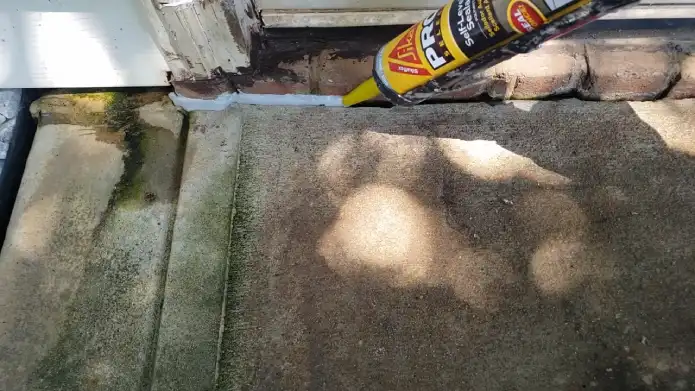
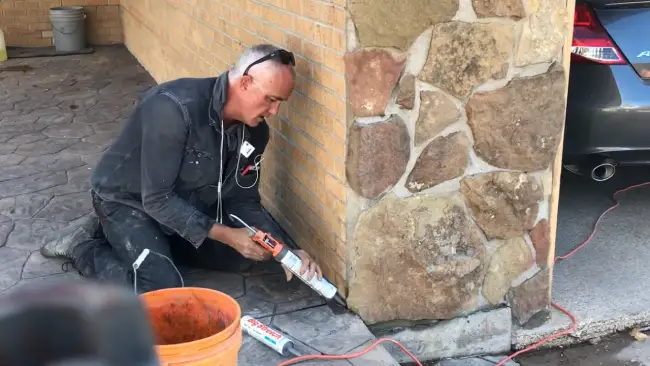
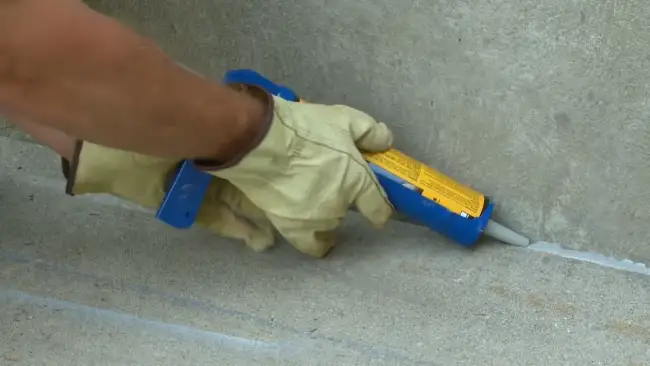
STEP 5. Caulk the Gap
It’s time to grab your caulk and fill that gap. With your disposable gloves on, cut the tip of your urethane caulk tube at a 30-degree angle to allow for a smooth flow of caulk.
Slowly work your way from one side of the gap to the other, completely covering the foam backer rod with the caulk. Use your caulk gun to load the caulk and fill the gap, ensuring that no part of the foam backer rod is visible through the caulk.
As you work, keep a steady hand and pace, ensuring an even and consistent application of caulk.
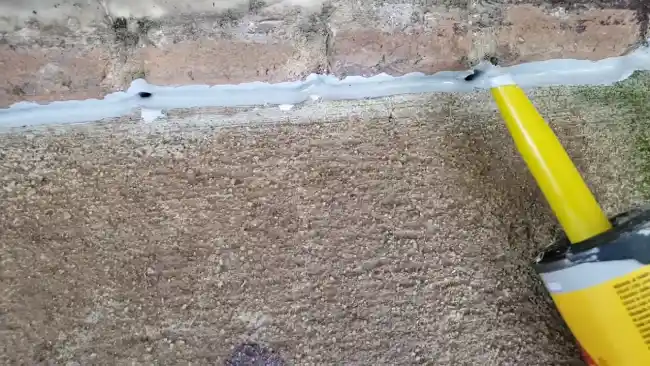
STEP 6. Caulk Small or Hairline Cracks
Now that you’ve caulked the main gap, it’s time to look at the smaller cracks in your foundation. These cracks may seem insignificant, but they can still let in moisture and cause damage over time.
So, take a moment to inspect your concrete foundation and identify any hairline or small cracks that need to be sealed. To begin, clean out any dirt or weeds growing in these cracks. You want to create a clean surface for the caulk to adhere to.
STEP 7. Smooth the Caulk
Achieving a flawless finish for your foundation’s caulk is important for creating a barrier that’ll keep moisture out for years. So, don’t forget to use a spoon dipped in mineral spirits to smooth out imperfections.
You need to do this so the caulk adheres properly to both the concrete and the house, preventing any cracks or gaps from forming. Here are some tips to make sure you get the smoothest finish possible:
- Hold the spoon at a slight angle to the caulk and apply gentle pressure as you move it along the length of the joint.
- Dip the spoon in mineral spirits frequently to prevent it from sticking to the caulk and help spread it evenly.
- Pay extra attention to the corners and edges, using the tip of the spoon to get into tight spaces and ensure a seamless seal.
STEP 8. Finish and Allow Curing
After smoothing out the caulk, give it ample time to cure before finishing with a top coat. The curing time for caulk can vary depending on factors like humidity and temperature. So refer to the manufacturer’s instructions for specific recommendations.
Generally, silicone caulk takes about 24 hours to cure completely, while acrylic latex caulk can take up to 48 hours. During the curing process, avoid touching or disturbing the caulk. This can cause it to crack or break, compromising its effectiveness as a sealant.
Once the caulk has fully cured, you can apply a topcoat to help protect it from UV damage and other environmental factors. A clear silicone sealant or a paintable caulk can be used as a topcoat.
Why Is Sealing Between Concrete and House Important?
If you’re wondering why sealing between concrete and the house is important, let’s consider these key points.
#1 Water Protection
Protecting your home from water damage is crucial. Even small amounts can cause expensive repairs and mold growth. In fact, according to the Insurance Information Institute (III), water damage is one of the most common and costly types of home insurance claims.
Sealing the gaps between concrete and your house prevents water intrusion.
#2 Damage Prevention
Preventing damage to your home goes beyond just protecting it from water intrusion. It requires taking proactive measures to ensure the longevity of your property. One of the most important measures is to prevent gaps and cracks in your concrete from worsening over time.
These openings can lead to concrete settling or shifting, which can cause significant damage to your home’s foundation. To prevent this, regularly inspect your concrete for any signs of wear or damage. If you find any cracks or gaps, it’s important to seal them as soon as possible.
#3 Pest Prevention
Now it’s time to tackle those pesky critters and keep them from making a cozy home in your humble abode. Pest infestations can cause serious damage to your property. Not to mention the health risks they pose to you and your family.
Sealing the gaps is the best way to prevent them from entering your home. Start by inspecting the exterior of your home and identifying any gaps or cracks that could serve as entry points for pests. Once you’ve identified them, use a high-quality sealant to fill in the gaps.
#4 Energy Efficiency
You can save money on your energy bills and make your home more comfortable by filling gaps and cracks that allow air to escape or enter your home. Sealing gaps between your concrete and house walls can significantly improve your home’s energy efficiency.
These gaps can be found around windows, doors, or other areas where the foundation and walls meet. By sealing these gaps:
- You can reduce drafts,
- Prevent air leakage,
- Improve insulation,
- Reducing heating and cooling costs.
What Caulk Options Are Suitable for Sealing Concrete and House Walls?
When sealing between concrete and your house walls, several caulk options are available:
#1 Polyurethane Caulk
Use polyurethane caulk as a flexible barrier that moves like a rubber band with your house. This prevents any gaps or cracks from forming over time.
This is an excellent option for sealing between concrete and house walls. It adheres well to both surfaces and can withstand movement and temperature fluctuations without cracking or losing adhesion.
#2 Silicone Caulk
Silicone caulk is a flexible, watertight option for connecting different materials and preventing unwanted gaps or cracks. It’s a popular choice for sealing gaps between concrete and a house due to its ability to form a strong bond with both materials.
Also, silicone caulk is resistant to temperature changes and UV rays, making it a durable option for outdoor use. But remember that silicone caulk isn’t as flexible as polyurethane and may require more frequent maintenance.
#3 Hybrid Sealants
A hybrid sealant combines the best features of polyurethane and silicone caulk for a sealing solution that’s as flexible as a gymnast and as strong as a superhero.
Hybrid sealants offer superior adhesion, flexibility, and water resistance, making them perfect for sealing the gap between your concrete and house.
#4 Self-Leveling Concrete Caulk
Self-leveling concrete caulk is the way to go if you want a smooth and even finish for sealing gaps in your concrete slab or driveway. This type of caulk is specifically designed for horizontal applications and can flow into the gaps and level itself, providing a seamless finish.
This concrete caulk is durable and can withstand extreme weather conditions like heat or cold. But before applying the self-leveling concrete caulk, clean the gap thoroughly and remove any loose debris or dirt. Also, ensure that the gap is dry before applying the caulk.
Should I always caulk where concrete joins a house?
Ensuring covering every nook and cranny where the concrete and house meet is crucial for maintaining a sturdy and pest-free structure.
Although caulking these gaps might not always be necessary if the area is enclosed or covered, it’s a proactive step to prevent future water damage. Plus, sealing the gaps can also help minimize the entry of pests into your home.
How long after should I seal between the concrete and the house?
Filling any gaps or joints between your concrete and house once a year or as needed is vital. Using a urethane caulk or polyurethane caulk will help prevent water damage, lessen pest infestations, and maintain the structural integrity of your home.
Neglecting caulking may lead to significant problems and costly repairs down the road. Therefore, it’s critical to have a yearly maintenance routine that includes inspecting and repairing any gaps or joints.
Seal Your Home Strong: Apply Caulk to Create a Fortress-like Barrier
As you apply the caulk, imagine creating a barrier between your home and the outside world, like a fortress protecting its inhabitants. This symbolic gesture reinforces the importance of sealing and reminds us of the value of our homes.
Following those steps will help you protect your home against water damage, pests, and air leaks. Remember, sealing between concrete and the house is important not only for the longevity of your home but also for your health and comfort.
By preventing moisture and air leaks, you can reduce the risk of mold growth and improve indoor air quality. So go forth and seal with confidence, knowing you’re taking care of your home and family.