For a safe electrical system, ground rods are essential items. This is because the ground rod makes a route for the stray electricity during the short circuit or any other reason.
When driving the ground rod, you choose the appropriate location to install the ground rod. But it becomes hard for you when you are installing the ground rod in rocky soil.
We will guide you with some easy techniques that will help you to drive a ground rod in rocky soil to make your electrical panel safe from electric fire and injury.
What Are the Critical Steps to Drive a Ground Rod?
You can follow below simple steps to drive a ground rod in the rocky soil.
Finding Appropriate Location
The first essential thing is to find the location to install the ground rod. You need to drive it firmly and locate where you can hammer the rod minimum of 8 feet down into the ground.
Whether you install it closer or away from your building, choose the place where you can hammer it for 8 feet down. Rocky soil almost very hard, but you can find some softer places with a bit of search around your building.
Set the Route for Grounding of Electrode Conductor
You will need it to connect with a ground rod with the electrical panel, so plan a route for grounding the electrode. So when picking the place for the ground rod, it is an essential factor to consider.
Ensure the grounding cable can easily route with the electrical panel where you will position the ground rod.
Ensure no Hurdles in the Way
When you are choosing the place, also make sure that there are no pipes or wires in the path of the ground rod. Ensure that you will not damage anything in the ground where you will install the rod.
Some national hotlines or gas pipelines can be in the way, so make sure there are no such hurdles in the way.
Pick the Approved Ground Rod
It is essential to consider the specific metal material, length, and width of the ground rod. So when you are in the market, it is better to buy a made rod explicitly for that purpose.
If you buy an approved rod, it is verified and will ensure your correct size, width, and rod length. No worry about that because most of the stores have approved rods stock with them.
It is best if you pick the copper material made ground rod because copper is the best conductor. You will need to dig the rod 8 feet down in the ground, so take a length more than 8 feet, and recommended width should be 1.3 cm. But if you are not buying an approved rod, then 1.6cm width is correct to choose.
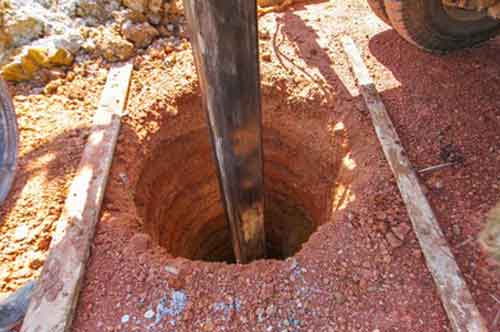
Dig a Hole for the Rod
Now you need to dig a hole; for installing the ground rod, you will need to dig a spot for a minimum of 8 feet down in the ground. You cannot hammer the rod in rocky soil so dig a hole for 8 feet to install the ground rod.
You can use a shovel and drill machine to dig the hole in the rocky soil. If you see the below surface is softer, and you can hammer, dig a spot for a minimum of 4 to 5 feet down with a shovel and drill machine.
Once you see that the surface is now easy to install the rod with a hammer, put the last end of the ground rod in the hole and start hammering.
Rocky soil is more complex than other soils, so you will need to use a heavy-sized hammer and use more force to install the rod in the hole.
Drive the Rod in the Hole
You can drive the rod in the hole through the use of a drill machine or any other heavy-duty driving tools. For the rocky soil, driving tools are better to use than drill machines.
Driving tools come with enough length rods that easily can dig the long hole in the rocky soil to install the ground rod in that hard rocky soil.
Ensure that you have dug the hole for a minimum of 8 feet and contact the ground. So for that purpose, if the soil is very hard, then use the driving tool.
It is the hard step of driving the ground rod in the rocky soil, and it may take a much time, and it is also challenging to work. If someone can help you, it will be easier, but if you are alone, use the driving tool.
You can keep one or two inches out of the soil surface, but it should be covered in the earth according to the rule.
Connecting the Electrode
Pull the electrode conductor to connect it with the ground rod; once you have correctly driven the rod into the ground, the next task is to combine it with the building electrical system.
For that purpose, pull the grounding electrode on the top of the rod and make sure you have removed enough length that is fit to connect it permanently.
After that, clamp the ground electrode conductor with the ground rod; you will need one clamp gently put the rod and conductor ends in the clamp and turn the screw of the clamp and press them together firmly.
In the end, connect the grounding electrode with the grounding bus; it will work as the neutral wires and connect with the electrical panel. You have completed your job and now enjoy the safe electric supply in your home.
Final Thoughts
Ground rods are essential for a safe electrical system and to ensure a secure supply of electricity in your home. You can drive a ground rod anywhere, but it becomes a tough job when it comes to installing in rocky soil.
You may know many tricks, but your job will become easier for rocky soil if you use the drill machine and driving tools. If the surface is softer below, you can also use a hammer, but driving tools are best for rocky soils.