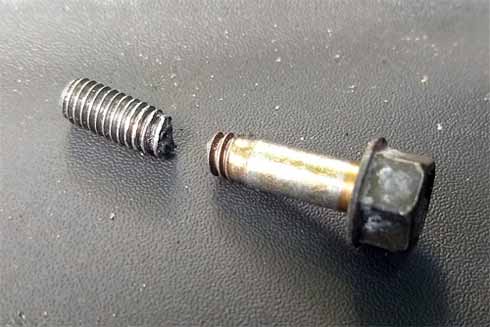
I am a car mechanic, and I faced a problem when I found the broken bolt and removed them from aluminum. But these bolts are too firm and look like they are welded; if I apply much force, it also damages other parts of the aluminum engine.
Whenever I face that problem, it makes me annoyed, and I get tired after removing them. So I decided to find a simple way to remove broken bolts from aluminum. I have researched and found a straightforward and helpful way that helps me now to remove broken bolts from aluminum without any damage to engine parts.
What is a Simple Technique to Remove Broken Bolts From Aluminum?
Broken bolts make your repairing job challenging; even with many efforts, you cannot remove them, and it looks impossible to extract.
When bolts break and are stuck in aluminum blocks, you try some tested methods to remove these blocks’ broken bolts. You need some skills, guidelines, and patience to remove broken bolts from aluminum blocks.
Here are simple step-by-step guidelines that will help you remove broken bolts from aluminum without damaging your aluminum engine parts.
Step One:
First of all, arrange all the necessary tools that you need to complete your job efficiently. You will need locking pliers, penetrating oils, Bolt remover, and a Propane torch. You can get all of these materials from the local hardware store.
Step Two:
Once you have bought or rent all the tools and materials, now start your job. First, take penetrating oil and apply it to the surface. You can take Mystery Oil or WD-40; try to use that on the surface around the bolt head.
Allow that around gently and slowly, and it will automatically penetrate into threaded portions. Leave it for three to four hours. It will completely penetrate into the broken part and make it loose as much as possible.
Some people apply too much oil. They think it will quickly penetrate, but they are wrong to use only a sufficient and required amount of oil that adequately covers the area around the broken bolt and leave it for three to four hours.
Step Three:
Now take Locking pliers and tighten its pair until you make sure its teeth properly fit around the bolt’s remaining parts. Do not apply too much force. It can also cut the remaining parts of the bolt and make it very difficult for you to remove the remaining parts.
Clamp the pliers around the broken bolt and turn them gently; you will need to repeat that process many times. Be patient and turn it gently without exerting much force, which may cause damage to aluminum and broken bolt.
Try it several times. If it works, remove the broken bolt with locking pliers, but if it does not work, do not waste your time on that and go for the next step.
Step Four:
Now heat can help you to remove the broken bolt from aluminum. Take a propane torch and heat up the bolt and a small portion around the bolt’s surroundings.
When you are heating with a propane torch, make sure you keep the propane torch a few inches away from the bolt. You do not need to touch the torch to the bolt or aluminum surface; the only flame is enough heat. It is better to keep it ¼ inch of space around the bolt.
Now, wait for a couple of minute’s maybe it will take five to ten minutes depending upon the thickness of aluminum. When you see the metal turns red hot, take away the propane torch and allow the bolt and surface to cool.
Step Five
Wait for ten to twenty minutes; when you feel the surface and broken bolt become cool, use locking pliers again.
Tighten both ends of the pliers around broken bolt parts, but this time you need to be more careful because heat, bolt, and aluminum surface become softer and can quickly break. Try to turn the broken bolt by applying force on pliers.
Try it five to six times; if it is working, remove the broken bolt from the aluminum surface, but it does not work, then go to the next step to remove bolts.
Step Six
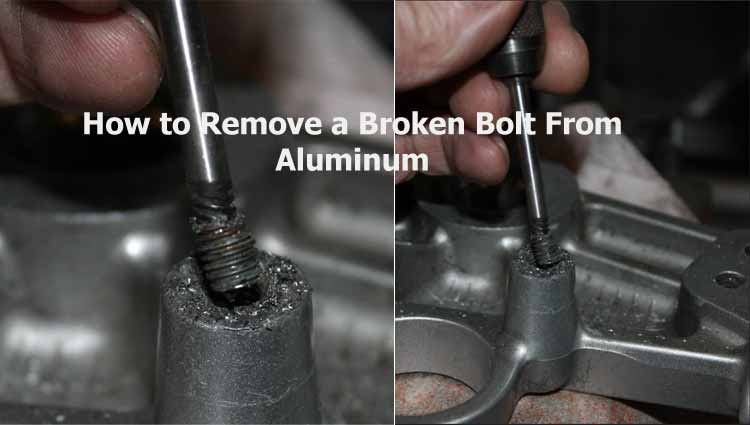
In the final step, file down the bolt’s top by using a metal file and make sure the surface has become perfectly flat. Now use bolt removal to remove broken bolt from aluminum surface. Place the bolt removal on the flat surface and turn its bit until you see it properly locks into the bolt.
Twist the bit back to the left to turn the bolt and remove the broken bolt from the metal surface. It is the last technique and will indeed work. If you have tried all of the above methods but cannot remove broken bolts, hire a professional; he may know many other tricks to remove broken bolts.
Helpful Tips:
- You will find many sizes of locking pliers from the hardware store, but try to get the right size according to your broken bolt’s length; otherwise, you cannot make a perfect fit around the broken bolt.
- There is no doubt it needs force to remove bolts from aluminum, but you need to apply pressure wisely. If the bolt broke in the aluminum surface, it would become complicated to remove.
- Wear safety gear such as gloves and eyeglasses because you may injure your hands when applying force, so wear gloves. They will also make a good grip on plier handles. Eyeglasses will protect your eyes from flame when you use a propane torch.
- Do not remain on one method when it is not working; if one step does not work, try it three to four times and then go to the next step. It will save your time and efforts.
You Might Also Like: How to Choose Between Propane and Mapp Gas
Final Thoughts:
It is common that bolts are stuck on aluminum surfaces, such as in engines. You may get frustrated when removing the bolts, but you will easily remove broken bolts from the aluminum metal if you follow the above simple techniques.