The popularity of prehung doors can be attributed to their ease of installation and providing a finished appearance. But painting prehung doors is not as easy as it seems. You can surprisingly make an unintentional step and end up with an uneven surface or painted door.
In most cases, people attempt to paint pre-hung doors by themselves, resulting in catastrophe. Without the proper tools and knowledge of how to paint prehung doors, it can be hard to achieve a smooth, even finish.
Prehung door painting is a relatively straightforward process that can be accomplished in only a few hours. As a result, there are a few steps you need to follow to achieve the most effective results.
The purpose of this article is to explore them for further information.
How to Paint Prehung Doors [DIY Steps]?
Whether you’re giving your home a much-needed makeover or simply trying to spruce up a rental unit, painting pre-hung doors is a relatively easy and inexpensive way to achieve great results.
Here are a few simple steps to follow for the best outcome:
Step 01. Choose the Right Paint:
The first is the type of paint you want to use. There are oil-based paints and water-based paints, and each has its own benefits. Oil-based paints are more durable and resist stains better, but they’re also more difficult to clean up if you happen to get untracked.
Water-based paints are easier to work with and clean up, but they’re not as durable as oil-based paints. The second thing you need to consider is the finish of the paint.
Do you want a glossy finish or a matte finish? A glossy finish will make your door shine, but it’s also more prone to fingerprints and smudges. A matte finish won’t show fingerprints and smudges as much, but it won’t have the same highshine as a glossy finish.
Choose the right paint for your needs and you’ll be sure to have a beautiful prehung door that lasts for years.
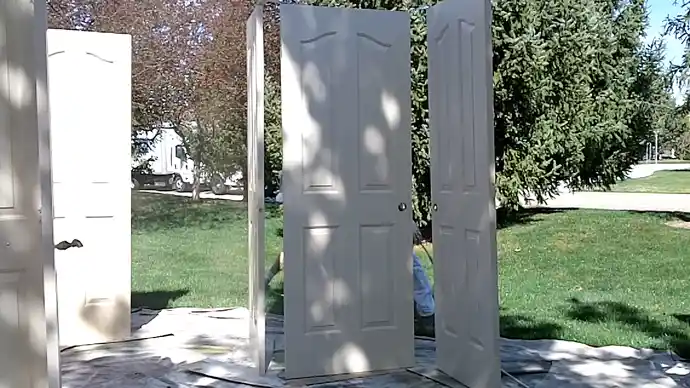
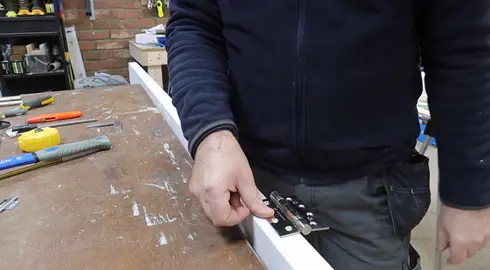
Step 02. Take Off the Hinges and Remove the Door Jamb:
At this point, your door should be sitting in the middle of your painting area, leaning against something to support it. The first thing you’ll want to do is remove the door from the jam and take off the hinges.
This will make painting much easier and help you avoid getting paint on the hardware. Once the door is removed, set it on a few saw horses or another flat surface.
If you’re working in a garage or other well-ventilated area, you may want to open the door up so that you can paint both sides at once. Otherwise, start with one side and then flip the door over when you’re done.
Step 03. Sand Down Any Rough Spots or Areas:
If the surface of your door is rough or uneven, sanding it down will create a smooth surface for the paint to adhere to. You will need medium-grit sandpaper and a hand sander to sand the door.
Start by sanding down any areas that are raised or have rough edges. Once you have finished sanding, wipe down the door with a damp cloth to remove any dust. Once the door is clean and smooth, you are ready to start painting!
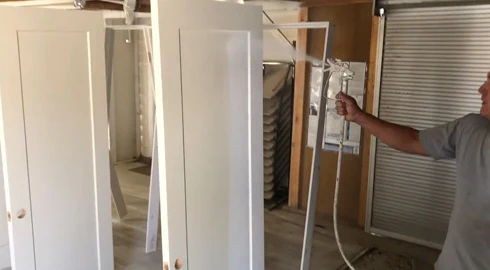
Step 04. Prime the Door and Apply Two Coats of Paint:
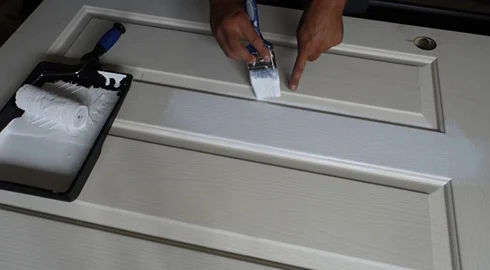
Once the door is prepped, it’s time to start priming. Apply a generous amount of primer to the door using a brush to ensure it is evenly coated. After the primer has dried completely, continue with the next step.
Applying two coats of paint is always best practice, so paint the first coat when the primer is dry. Once again, cover all sides evenly and allow the paint to dry before applying the second coat.
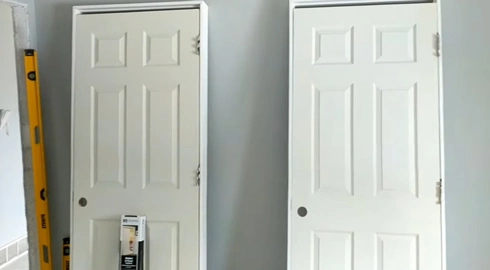
Step 05. Let the Paint Dry:
Once you have finished applying the paint to your prehung door, it is essential to let it dry completely before moving on to the next step. Depending on the type of paint you are using, this could take a few hours to a few days. If you are in a hurry, you can always use a fan or hairdryer to speed up the drying process.
However, be sure not to put the appliances too close to the door, as this could cause the paint to bubble and warp. Once the paint is completely dry, you can move on to installing your newly painted prehung door.
Step 06. Reattach the Hinges of the Door:
Prehung doors have hinges already attached, but if you’re painting an already installed door, you’ll need to remove the hinges first. Upon drying the paint, the hinges can be reattached and the door reinstalled.
Follow these steps to reattach the hinges of a prehung door:
1. Begin by aligning the hinge on the door with the hinge plate on the frame. Make sure that the hinge pins are facing up.
2. Using a screwdriver, drive the screws through the hinge and into the doorframe. Start with the top screw and work your way down.
3. Once all of the screws are in place, check that the door is appropriately aligned and close it to make sure that it latches correctly.
Step 07. Finish up by Adding a Coat of Sealant:
You’re almost done. Just a few more steps and your freshly painted prehung doors will be completed. The final step is adding a sealant. This will protect your doors from dirt, grime, and moisture and make them easier to clean.
To apply the sealant, simply use a paintbrush or roller to apply an even layer to the door’s surface. Once the adhesive has been applied, allow it to dry completely before attaching the hardware and hanging your doors.
So these are some simple steps you can follow to paint your pre-hung doors. Just remember to take your time and be careful, and you’ll be sure to end up with beautiful doors that you can enjoy for an extended period.
Pro Tips for a Beautiful Paint Job on Prehung Doors
A fresh coat of paint can do wonders for a room, and pre-hung doors are no exception. If you’re planning to give your doors a makeover, here are a few tips to help you achieve a beautiful finish:
01. Analyze the Last Paint Type:
Before deciding what kind of paint to use on your pre-hung doors, you need to look at the existing paint job. Depending on the condition of the paint, you may be able to simply touch it up with a new coat of the same type.
However, if the present paint is peeling or otherwise damaged, you need to obliterate it before repainting. This can be a time-consuming process, but it’s essential to do it right to ensure a beautiful final product.
02. Buy Top-Quality Materials & Tools:
The best way to achieve a high-quality paint job is to start with high-quality materials. For pre-hung doors, invest in solid wood or steel doors. You’ll also need a good quality paintbrush, spray gun, roller, and drop cloths.
03. Consider the Door Colors:
The beauty of a pre-hung door is that it comes painted and ready to install. If your door has wood trim, you’ll want to choose a color that complements the wood grain.
White or cream colors tend to work well with wood trim, but you can also go for a bolder color if you want to make a statement. If your door has metal trim, you can be more adventurous with your color choices.
04. Detach Hinges & Jamb Correctly:
One of the most important aspects of a good paint job is taking the time to properly prep the surface. This means paying particular attention to areas like doorjambs and hinges, which can be tricky to navigate.
When detaching hinges, use a putty knife or another flat-edged tool to avoid damaging the wood. Once the hinges are loose, the door can be removed from the jamb.
Be careful not to damage the paint on the door or jamb as you remove it. When it comes time to reattach the door, use new screws and nails to ensure a secure fit.
05. Remove those Doorknobs.
Most people don’t realize that doorknobs can scratch up the paint interior doors. So, before you even start painting, make sure to remove them. This will also make it easier to paint the door without worrying about messing it up.
To remove the doorknobs, start unscrewing the screws that hold them. You may need a screwdriver or drill to remove the screws. Once the screws are removed, gently pull the door knob off the door.
06. Fill in Cracks and Holes:
Even new doors can have cracks and holes that need to be filled in before painting. Use a putty knife to fill any large holes with wood putty. For more minor cracks, you can use caulk.
Be sure to smooth out the putty or caulk to level with the door’s surface. Once it is dry, sand down any rough edges. Now your door is ready for primer.
07. Sand and Prime:
Sanding and priming are two important steps in ensuring a beautiful paint job on your pre-hung doors. Sanding helps create a smooth surface for the paint to adhere to, and it also gives the paint something to grip onto so that it doesn’t chip or peel over time.
Priming provides an additional layer of protection against wear and tear, and it also helps the paint adhere to the door better. Sand the door lightly with fine-grit sandpaper to ensure the paint adheres well. Next, apply a primer designed for use on wood surfaces.
08. Painting Without Interruption:
One of the keys to a successful paint job is painting without interruption. This means starting at the top of the door and working your way down in a smooth, even motion.
Cover the door with a tarp or drop cloth to prevent paint from drying on the surface if you need to take a break. Once you’re ready to continue painting, simply remove the tarp and pick up where you left off.
FAQs
Let’s have a look at some frequently asked questions that will help you understand the process of pre-hung painting interior doors better:
Q. Do You Need to Prime a Prehung Door?
When using a latex-based paint, priming is generally not necessary. However, if you’re using oil-based paint, it’s a good idea to prime the door first. This will help to ensure that the paint adheres evenly and smoothly to the door surface.
It’s also good to prime if you’re painting over a dark color or if the door surface is particularly rough or textured.
Q: Should You Paint a Door Before You Hang It?
The short answer is yes, and you should paint a door before hanging it. This will help you avoid having paint on the door frame or floor. Plus, it’s easier to paint a door when it’s lying flat. If you are confident in your ability to paint neatly and avoid getting paint on surrounding surfaces, then painting the door before hanging it may be best.
Q: How Long Should You Wait to Close a Door After Painting It?
It is best to wait at least 24 hours before closing a door that has been painted. This will let the paint dry and cure. You should wait for at least 48 hours before shutting the interior door for safety reasons.
Once the paint has had a chance to dry completely, it will be less likely to chip or peel when the door is used. But, if you wait too long to close the door, the paint may start to sag or drip.
Q: Can You Use a Roller to Paint a Door?
Yes, a foam roller can be used to quickly and evenly paint doors. Foam rollers are beneficial if you’re painting a large door or need to cover a lot of surface area. However, it is advisable to use a brush for the first coat of paint. This will ensure that the paint is evenly distributed.
Conclusion
Prehung doors are a wise option for any home improvement project because they are easy to install and provide a clean, finished look. It is pertinent to note that before enjoying the benefits of pre-hung doors, you will need to paint them.
The good news is that painting a pre-hung door is not tough, and there are a few tips that can help you get the most satisfactory results. By carefully following the instructions on how to paint prehung doors, you may find the process easier and the results better than expected.
You can start your project now that you know the basics of painting a pre-hung door.