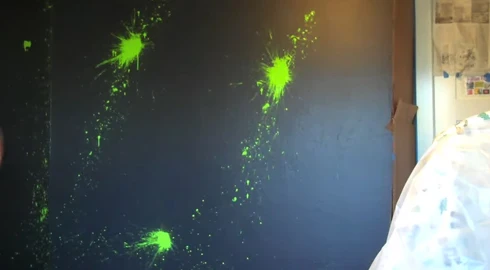
Spray paint tends to make things blotchy if you try to paint something with it. If the paint on your house is peeling, or if it doesn’t look polished, it’s a problem.
It happens because the paint doesn’t go on evenly, and you may not get the coverage you need. Instead of throwing it out, you can fix the blotchy spray paint.
Here we will discuss some tips and tricks on how to fix blotchy spray paint. We will also talk about preventing this from happening in the first place. So if you are looking for ways to improve your DIY painting projects, keep reading.
8 Steps Guide : How to Fix Blotchy Spray Paint?
As any painter knows, a smooth and consistent finish is essential for a professional-looking finish. However, sometimes even the most careful painter can end up with a blotchy surface.
An uneven application of paint often causes this problem, but it can also be the result of environmental factors such as humidity or temperature. Fortunately, there are some steps that can be taken to fix this problem.
Step 01. Gather Supplies:
Before starting any project, it is always important to gather the necessary supplies. This is especially true for painting, as the right supplies can make all the difference in the final product.
When spray painting, it is important to use high-quality paint and to thin it out properly. In addition, you will need a clean surface to work on and something to protect yourself from the fumes.
- A fresh can of paint – to apply the new paint color.
- Face mask and goggles – to protect your respiratory system and eyes from the fumes of the paint stripper.
- Wire brush – to remove any loose paint or rust.
- Dish soap – to clean the surface before painting.
- Standard sponge – to apply the paint stripper
- Clean Cloth – to wipe off the excess stripper.
- Painter’s tape – to create clean lines and prevent over-spray.
Once you have gathered all of your supplies, you are ready to begin.
Step 02. Surface Preparation
Before painting any surface, you need to prepare the surface to ensure that the paint adheres evenly and forms a smooth finish. There are three types of surfaces that you can work with: metal, wood, and plastic.
Metal Surface:
If you’re dealing with a metal surface that has been previously painted, the first step is to take off any loose paint. Use a sponge or moist rag to wipe away any peeling paint, then use a microfiber cloth to remove any residual paint dust.
If the surface is particularly rough, you may need to use a wire brush to rub away any rust. For loose paint, use sandpaper or a sander to remove it. If the paint is in good condition, you can simply wipe it down with a damp cloth.
Wood Surface:
The trisodium phosphate will remove any dirt, grease, or grime that could cause uneven spray paint. The sanding will create a smooth surface for the paint to bond to. It’s important to take the time to do this step correctly, as it will make a big difference in the final results.
Plastic Surface:
Wipe down the plastic with a moist rag or soft cloth to remove any dirt or debris. Once the surface is clean, wipe it with a microfiber cloth to get rid of any remaining moisture. When the surface is completely dry, lightly sand it with fine-grit sandpaper to create a smooth, even surface that will adhere to the paint.
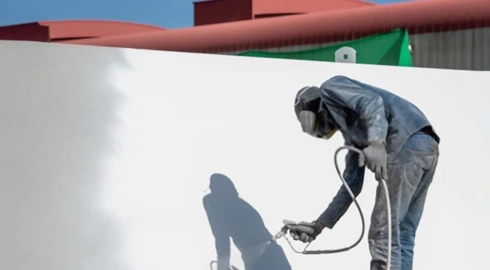
Step 03. Set Your Spray Gun Pressure:
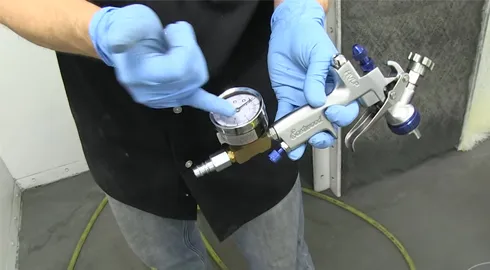
It’s time to set your pressure. You will see two types of pressure listed for your compressor. If the pressure is too high, the paint will come out in thicker droplets and is more likely to settle unevenly on the painted surface.
You will want to set your compressor at 28-29 PSI for paint spraying. According to experts, an HVLP spray gun operates at 10-14 scfm@40 psi. If you’re not sure what pressure to use, it’s always best to start low and work your way up until you find the perfect setting for your project.
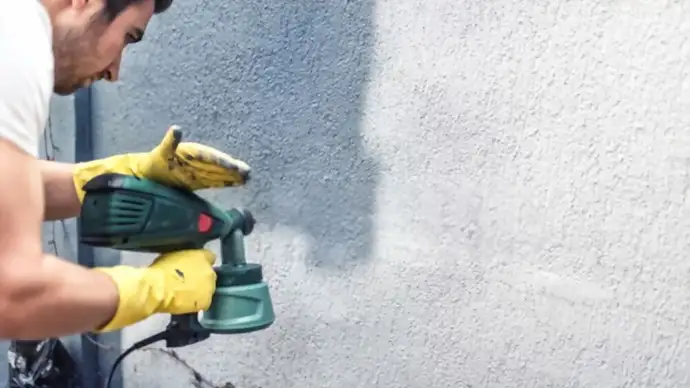
Step 04. Find the Right Distance:
The right distance to hold a paint sprayer from the surface you’re painting depends on the type of sprayer you’re using. For an HVLP gun, you’ll want to hold the gun about 8 inches away from the surface.
8-10 inches is generally sufficient to hold a standard spray gun. For an airless spray gun, hold it 10-12 inches away. Use tape to cover any areas that you don’t want to get paint on.
Step 05. Apply a Primer:
When choosing a primer, be sure to select one that is compatible with the type of paint you will be using. For best results, apply the primer in a thin coat, even coats. Once the primer is dry, you can begin applying your new paint.
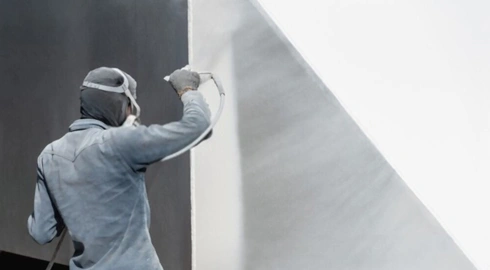
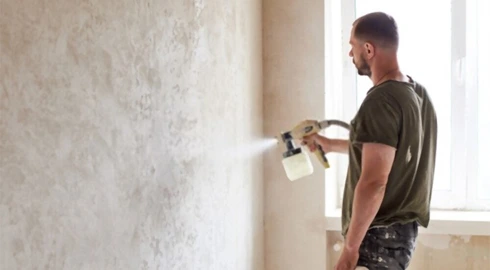
Step 06. Apply the First Coat of Paint:
You will need to shake the can for one minute before beginning. Next, hold the can 8-10 inches away and use a steady, even motion to apply the topcoat.
When applying the clear coat, it may be helpful to start at the top of the surface and work your way down. Allow ample time for the paint to dry between coats.
Step 07. Apply Additional Coats:
Apply additional coats until you achieve the desired coverage. In most cases, two or three additional coats should be sufficient.
Step 08. Inspect the Entire Surface:
Inspect the surface for any areas that may have been missed or that seem particularly dirty. If necessary, clean the surface with a soft cloth before proceeding. Moreover, you have to clean the spray gun and other equipment properly to avoid any paint buildup.
That’s it. You’ve now successfully fixed your blotchy spray paint. With these simple tips and tricks, you’ll be able to achieve a beautiful, even finish.
Blotchy Spray Paint: How Does It Look?
Anyone who has ever tried to paint a wall or piece of furniture knows that a perfectly even coat of paint is sometimes difficult to achieve. One common problem is known as “blotchy spray paint.”
When It happens, you see a different look on your wall than what you expect to see. Here are some looks that you may have seen:
Orange Peel:
Many people are familiar with the frustrating phenomenon known as “orange peel” when they’re painting. This happens when the paint doesn’t lay down smoothly but instead forms a series of bumps.
While there are many possible causes of this effect, one common culprit is using a thick coat of paint. When the paint is applied too thickly, it doesn’t have a chance to level out before it starts to dry. This can be especially problematic when using the wrong type of spray gun.
Using a high-pressure paint gun speeds up the drying process, which often goes on even thicker than regular paint.
Fortunately, there is a simple solution: adding a little bit of thinner to the paint. This allows the paint to spread more evenly, resulting in a smoother finish and preventing orange peel. Use a low-pressure gun, or make sure to thin the paint before spraying.
Cracking:
Cracking is a common issue when it comes to spray paint. It is caused by the paint not being properly mixed, which causes uneven spray paint. The result is a splotchy, patchy finish that is very unsightly.
There are a few different ways that you can try to fix this problem. One is to apply a clear topcoat over the entire piece. This will help to even out the sheen and protect the paint from further damage.
Another option is to sand down the area with the most damage and repaint it. This can be a time-consuming process, but it will ultimately give you the best results.
If you don’t have time for a full repaint, you can try touching up the area with a matching paint pen or brush. This won’t completely fix the problem, but it can help to minimize the damage. Whatever solution you choose, be sure to take your time and work carefully to ensure the best results.
Paint Blobs:
Blotchy spray paint can often be the result of paint blobs in the paint mixture. A build-up of paint usually causes paint blobs on container sides or by shaking the container too vigorously. When these blobs get into the paint mixture, they can cause the paint to come out in uneven bursts, resulting in a blotchy finish.
As a preventative action, be sure to clean the sides of the container regularly and avoid shaking the container too much. If you do notice paint blobs in your paint mixture, you can try to remove them with a strainer or by letting the mixture sit for a few minutes so that the blobs settle to the bottom.
Flaking and Peeling:
A flawless finish is always the goal of painting projects. But sometimes, no matter how careful you are, your paint job can end up looking less than perfect. If you notice that your paint is flaking or peeling, it’s important to take action right away.
Otherwise, the problem will only get worse. Not only will flaking and peeling paint ruin the look of your project, but it can also lead to more serious problems like rust and corrosion.
Luckily, there are a few simple steps you can take to prevent paint peeling. Remove any loose paint using a scraper or fine grit sandpaper. Apply a fresh coat of primer followed by a topcoat of paint. By spending a little time and effort, you can restore your old painting to its original beauty.
Paint Drips:
Everyone wants a high-quality, professional finish. However, achieving this can be difficult, especially if you are dealing with paint drips. It can cause blotchy and uneven paint, and it is difficult to clean up once they have dried.
The good news is that there are a few things you can do to prevent spray paint drips from ruining your paint job. Make sure you are using high-quality paint. When you are applying the paint, hold the sprayer 6-8 inches from your surface so that you can apply a light coat.
Fish Eyes:
Fish eyes are small craters that form in the paint as it’s applied, and they can spoil the smoothness of the finish. The main cause of fish eyes is contamination on the surface where the paint is applied. This could be anything from wax to oil, and it prevents the paint from sticking properly.
To prevent this problem, painters need to make sure that the surface is thoroughly clean and free of any potential contaminants. In addition, they should also test the paint on a small area before applying it to the entire surface. By taking these precautions, painters can help ensure a smooth, even coat of paint.
Shrinking:
Very cold or humid conditions can cause blotchy spray paint. This is due to the evaporation of the solvents in the paint before it has a chance to dry, which causes the remaining pigments to settle unevenly.
There are a few ways to prevent this from happening: Check the weather forecast and avoid painting in conditions that are too cold or too humid. Apply a thin coat of paint and allow it to dry completely before adding an additional coat. You should use high-quality paint that is designed for use in all weather conditions.
By following these simple tips, you can avoid common painting problems and achieve a beautiful, professional finish. With a little bit of knowledge and effort, you can turn any painting project into a success.
Why does Spray Paint Turn Blotchy?
Blotchy spray paint can be quite a nuisance. It can be difficult to apply evenly, and it often results in a dull, patchy finish. Uneven spray paint can be caused by a number of factors, including temperature, humidity, and the type of paint being used.
If the air temperature is too cold or the surface is too hot, the paint may not properly dry and will end up looking blotchy. Another possible cause is humidity.
If the air is too humid, the paint may take longer to dry and may also result in an uneven finish. In some cases, it can even lead to particle buildup, which can be difficult to remove.
Improper mixing and poor quality control are also common causes of blotchy spray paint. After the paint has been applied to the surface, it evaporates quickly, leaving behind a thin film of paint particles.
In addition, some types of paint are more likely to cause blotching than others. For example, latex paints tend to be more resistant to this problem than oil-based paints. By understanding the factors that lead to blotchy spray paint, you can avoid this problem and achieve a flawless finish.
FAQs:
Q: Should You Warm Spray Paint?
Yes, by heating the can of paint, you are reducing the viscosity of the paint and making it easier to spray. In addition, the warmer temperature will help the paint to dry faster. When using latex paint, warming it will also help to prevent clogging. Heating the paint will help to achieve a smoother finish with fewer brush strokes.
Q: Can I Spray Paint at Night?
You should not spray paint at night. The cold weather causes paint to thicken and not flow evenly, resulting in an uneven coating. You’re also more likely to get paint on yourself or your surroundings when it’s darker. The best time to paint is during the daytime when there is natural light.
Q: What Temperature is Best for Spray Painting?
The temperature should be around 50-90°F. It’s warm enough that the paint will flow well and dry quickly, but not so hot that it will evaporate too quickly or start to sag. If the temperature is too low, the paint will not dry properly and will not adhere to the surface. In addition, paint can freeze and become unusable.
Q: What Happens if You Spray Paint in High Humidity?
Most people know that it’s not good to paint in humid conditions. The moisture makes the paint dry too slowly, which can lead to runs and sags. In addition, high humidity can also prevent paint from adhering properly to the surface, resulting in an uneven finish.
Conclusion:
Spray painting is a quick and easy way to achieve an elegant finish. Sometimes, however, the paint can appear blotchy or uneven when applied in the wrong way.
We gave you a few ideas for how to fix blotchy spray paint, so that you’ll get great results. You should never stop moving your gun sprayer before stopping the paint and always hold it at the right distance from the surface. If you do these things correctly, your paint will go on evenly and without any streaks.
So don’t be discouraged if your first attempt doesn’t go as planned. Just keep trying, and soon you’ll be an expert painter and will have the perfect finish for all of your projects.
You Can Also Check: Do you know how to paint a plastic garbage can?