The cinder block pool is a really cool idea that has been around for many years. The project is cheaper and faster than a typical in-ground pool requiring less excavation, no liner, and is easier to install.
Tips on How to Waterproof a Cinder Block Pool
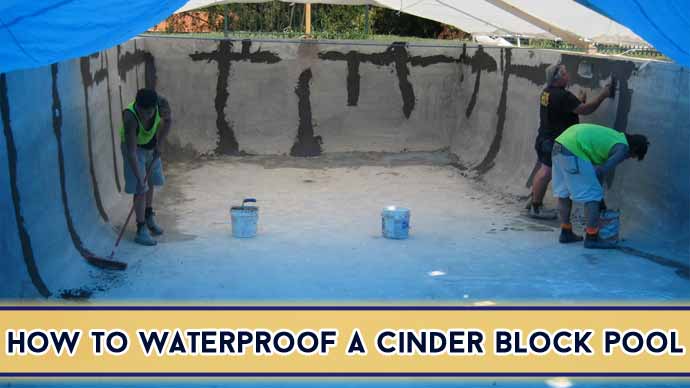
Cinder blocks can be an inexpensive, easy-to-install option for constructing a concrete pool in your backyard. However, without proper waterproofing, the structure will never stack up to what you were expecting. So, read this article on how do you waterproof your cinder block pool.
What do You Need before Getting Started?
Let’s take a look at what you need before getting started.
A Decent Shovel
Whether you use a concrete block or cinder block, they’ll need to be removed and replaced frequently when building your pool. A lot of the work goes down deep into the earth, so a heavy-duty shovel is essential.
Soil Removal Equipment
Even if you’re not planning on developing land where your concrete block or cinder block structure will be placed, you’ll still have to remove excess soil and gravel below your ground level with a bobcat. Mattock tools can also come in handy for removing large rocks or roots that may get in the way when digging around.
Be sure to wear protective gear, including heavy-duty gloves, goggles, and ear protection while operating heavy machinery.
Waterproofing Materials
You’ll also need a masonry waterproofer to waterproof your cinder block or concrete block structure. Layering a combination of cement, mortar, sealer, or sealant will prevent water from seeping through the cracks where blocks meet.
Cement Mixer and Cement Bags or Buckets
Installing an ICF pool with a cinder block or concrete block requires a lot of cement. So be prepared to do lots of mixing and hauling.
Note: We recommend leaving the cement mixing to the professionals unless you have previous experience with concrete.
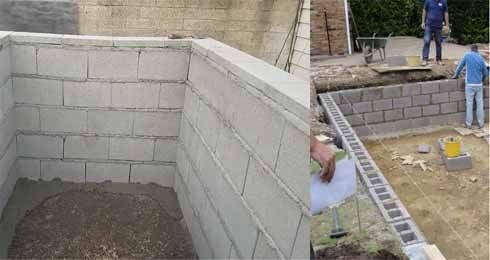
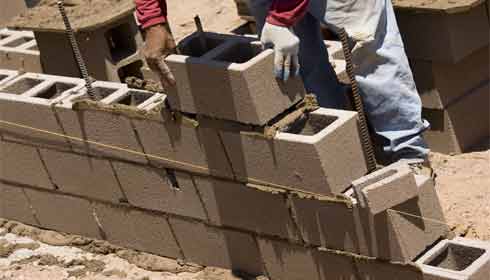
Step 1: Gather the Concrete Block
You’ll need the following amount of blocks:
- 4x 10″ for the long side of the pool
- 4x 7″ for the short side of the pool
- 2x 12″ for the base of both walls
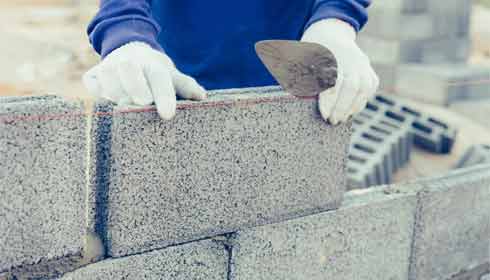
Step 2: Selecting Block Type
There are two types of blocks, “clinkers and mortar,” each requiring a different type of waterproofing. Clinkers are chunks of broken concrete that require a Portland-based product to seal them. Clinker pools are typically cheaper but don’t last very long before needing repairs to their seals. Mortar is more expensive but also lasts longer. However, mortar doesn’t require any additional sealant past what was applied during installation.
Step 3: Mortar Blocks
To waterproof mortar blocks, you’ll need a high-quality mortar sealant and two to three coats. Apply the sealer with a drill sprayer or caulking gun in even strokes. Use a plastic squeegee or push broom to remove any excess sealant before it dries.
Because of the thickness and viscosity of the product, applying too much can cause problems as it will take on an uneven texture, not to mention being harder to resist cracking over time due to extreme temperature changes typical of New England weather.
Step 4: Caulk All Seams
Caulk all seams with an exterior caulk designed for pools and spas such as DAP Tub & Tile Caulk or Great Stuff Big Gap Filler.
Step 5: Mix Mortar
Mixing your mortar to apply to a cinder block wall takes some practice but is one of the cheapest options out there. You’ll need a notched trowel for laying down cement board on top of your blocks, buckets for mixing mortar (5 gallons per 50 bags), and hoes or shovels for spreading it evenly around the framework of your pool. Because you’ll be working with cement, safety fiberglass and rubber gloves are a must.
Step 6: Apply Mortar
Apply mortar to both blocks and cement board. Use spacers if you have them, or simply place pieces of wood against the wall, so it is even on each side and trowel overtop of that.
Don’t forget about the corners. The edge where blocks meet needs to be water-tight as well, or your entire pool will leak when it’s time for cleanup. Apply an extra layer of mortar sealant at these key points before installation is complete.
Step 7: Check and Remove Sealant
Make sure not to get any sealant inside the pool. It can make chemical testing more difficult and cause lots of problems in the future, from cloudy water to mold growth due to improper drainage systems. You’ll also want to avoid getting any sealant on the water’s surface as it will make chemical testing and cleaning much more difficult.
Step 8: Removing Liner from In-ground Pools
If you currently have an in ground pool, don’t let that small investment go to waste. Your existing liner can be removed and easily waterproofed. Just take a utility knife and cut around the perimeter of your walls.
Step 8: Using Cinder Blocks
The biggest downside to using cinder blocks for your pool is that they aren’t reusable. Once you’ve installed them, there are no second chances. But, if done right, you can rest easy knowing that with proper care, your pool should last for years.
Step 9: Install a New Liner
Install a new liner or cut the old one down to size and apply it directly over top of the blocks. It will make it easier to clean as you won’t have to worry about removing dried mortar before getting in and out of the water. If you aren’t going to use a liner, apply a good layer of trowel-applied mortar overtops of your blocks. It will prevent any water from seeping “through” the walls and into the ground, which otherwise becomes a hard-to-find problem later down the road.
Place new bricks in areas where mortar may have worn or cracked previously. Cinder blocks are inexpensive and easy to install, making them a great option for those looking for a less expensive alternative to pool ownership or with limited time and energy.
Step 10: Apply Insulation
Properly insulating your pool is essential for letting your structure last for years without repairs and provides air circulation that prevents mold growth and algae from forming on the interior walls. In addition, the more water in the pool, the cooler it will be inside, which means less mold growth and algae, increasing the life span of your cinder block structure.
Step 11: Shape the Ground Around Your Pool
You can now shape the ground around your pool by adding an earthen bank and plant it, as well as adding other features such as stairs leading down into the pool area. For these items to remain in place, they must be anchored with stakes, and a lip of at least 1 inch is required.
Step 12: Deck the Outside Edge
After the ground level has been shaped to your liking, you can now install the pool deck around the outside edge. The cinder blocks will make it easy for you to get firm footing while you work. Just remember that all steps down into the pool area should have handrails and that you have a ladder for getting back out.
If there will be plants in the border, make holes for them with an auger at least 10 inches deep to accommodate their root systems once they are established. Keep the clay from the hole within reach so that it can be used as part of landscaping being added around the pool.
Step 13: Cover Pool Completely
The final step is to add a cover that completely surrounds the outside perimeter of the pool or as much as possible. It prevents debris from getting into the water and reduces evaporation due to sun exposure.
Now, you know how to waterproof a cinder block pool. It’s now time to fill up your cinder block swimming pool with water and enjoy it.
Conclusion
A cinder block pool is a great option for a pool in your backyard. Of course, you will need to waterproof it, or you will never be able to fill it with water. I hope this article has been of some help. But once you complete it, you may find that the cinder block pools are easier to manage on a day-to-day basis.